Friday, December 21, 2012

Die Cut Train Engine Ornaments

I have a quick holiday oriented post today.  Another custom order birthed a fabulous idea: Making my paper die cut train engine into a Christmas ornament!  I was struggling with how to personalize them, but then I had an idea that I just loved: smoke bubbles!

I had to figure out how to attach the smoke bubbles to the engine stack.  Enter: my so seldom used ribbon!


The ribbon is a little short to hang directly on a tree, but one can use those thin wire hooks that are meant for the round, breakable ornaments.  Those hooks can be purchased separately (because we all invariably loose a few each year!)

I made them reversible so if they spin or twist, they are complete on both sides.

The length of the name is limited.  I could always make the ribbon longer, but I think there is still some maximum.  My own nephews do not have long names.  They would fit perfectly in here.  If I find the time over the holidays, I might make a few for my tree!

Wishing you all a HAPPY and SAFE holiday season!

Sunday, December 9, 2012

Side Step Card Baby Girl Dresser

Here's another style of card I have been meaning to try for a while.  A manager at my work is due to have her first baby at the end of December and we had a baby shower for her on Friday.  Even though I have been working evenings of late (right to bed time), I had promised I would make her a special card.  So I stayed up past midnight one night to create this thing.  I was going to go for simple for my time constraints, but I really wanted to try this out.

The great thing about a side step dresser card is that you can make it for boy or girl simply by changing the colour scheme.

Click to read the poem.
I used my Hot Off the Press teddy bear stamp (coloured with copics with a sakura sparkle gel pen for the bow), my Quickutz onsie die, and my Stampin' Up! safety pin and welcome baby stamp.  I used some old button shaped brads I had and some lace someone gifted me.


I didn't have much else to stuff in the drawers - at least nothing small enough.  For something learned and completed at midnight, I think it turned out well.  I'm not often fond of tent fold cards, because they inevitably flatten out.  If I had more time, I'd have stuffed the folded card under something heavy for a day to really reinforce those folds.


My co-worker liked it.  That's what mattered!

Sunday, November 25, 2012

More Snowmen Cards for Kards for Kids

Kards for Kids is hosting a Christmas Card Drive Contest:  For every 5 cards you donate for the children at Toronto's Hospital for Sick Children, you have a chance to win a rubber stamp from amazing stamp companies: High Hopes stamps, Your Next Stamp, Kraftin Kimmie Stamps, Close to My Heart and Michaels.

This year's theme is snowmen.  I already made a set of snowmen cards with some stickers from the Sandylion Outlet store in Markham, Ontario.  I have now made another set, this time using a holiday paper stack from Die Cuts with a View.


Who says the focal point has to be a snowman?  There are two snowmen in the patterned paper, so I made the sentiment the focal point.  The sentiment reads: "It's the most wonderful time of the year."  It's from a set of holiday sayings by Stampendous.  I also used some old ribbon I had from Michaels Craft Stores that says "warm wishes".


I like this card (and the overall snowman theme) because it is winter-specific but not Christmas-specific.  When donating cards to Toronto's Hospital for Sick Children, you don't know what the background or ethnicity of the children are.  This makes it easier for the nurses to select and hand out cards.

I have left the insides blank.  Some of these cards are filled out by the nurses for the children, but I think some are also filled out by the children for the doctor's and nurses.  Using a more general winter theme makes the cards more versatile for whatever need for them exists.

Thursday, November 22, 2012

Thank-You Note Cards


In the spirit of US Thanksgiving, I thought I would tell a little tale of gratitude.

I went to some training for work in October.  It was "new manager orientation".  Since I have been a manager for a few years, I remember saying to another manager attending, "If I learn anything at this course, then I've been a bad manager!"  Lo and behold, it was not about the work or the workflow as much as it was about the soft skills.  Soft skills are so rarely well trained.  Long story short, I was impressed by the content I had not expected.  None of the ideas themselves were new to me, but the best take-away from it was the real world application.  Implementation is always where the greatest of plans and intentions fall down.  This course was full of implementation guidance and that's where the real value was.

I am thankful that the firm where I work invests in its people's soft skills.  Working in a service industry, people are what make your firm go round and not just the people you service, the people you employ too.  Even before we merged, I once had trouble with a client and I had been struggling with either bringing it up or quitting because quitting was easier.  The partner first thanked me for trusting him enough to come forward with the matter.  He said, "I would never want to lose a good employee over any client.  There are always more clients to get, but if I don't have good employees, I don't have a business."

I am lucky to work in a firm where people matter.  Sure, some days I feel like I don't matter and I sense my replace-ability more closely.  Sure, there are days when it really is only about "getting it done".  Those days, thankfully, are the minority.  The value of the people is constantly reinforced and that corporate culture is what has kept me in place for more than a decade.

Back to the soft skills course...
The key speaker mentioned in one of his many real world examples, that he likes to reward his clients with a real thank-you card: just a little note to connect with another person and remind them that they are important to him.  I decided right then that I was going to make little thank-you cards for the two key speakers and send them to them to give to clients or employees or whomever their hearts desire.

So, I rifled through my strip scraps and came up with the following designs: Simple, effective, masculine (since they are coming from men).

Click for larger view.
The leaves are a Hampton Art set I got at Michael's on sale.  The sentiment is Stampin' Up!  I used a border punch on a few.

Click for larger view.
In my last Christmas card to my pre-merger firm, I wrote in it a note of thanks for training me from scratch all through University, trusting me with challenges, and providing me guidance from mentors who actually are interested in seeing you develop.  I don't know what I'm going to do this year yet, but I still have a month or so to figure it out!

Saturday, November 17, 2012

Shake it, baby! A Birthday Shaker Card

A co-worker of mine turned 60 yesterday.  He has been mentoring me at work since the day I started, over 12 years ago.  He continues to take pride in his work and has great attention to detail.  I wanted to make him a special card.  My latest craze is making shaker cards.  It can be work, but you can make the shaker from any shape or size.  What held me back for so long was not having nested shapes like in the shaker card tutorial on Splitcoast Stampers that I first saw.

I finally obtained some from Stampin' Up! (nested labels) and made a card.  Then I saw another shaker card tutorial from Lynn Ghahary on Two Peas in a Bucket where she used a punch on a shape.  Eureka!  You don't need nested shapes.  You just need something with a window (of ANY shape) cut in it.

So... why not the zero in 60?


The 60 had to be pretty huge to fit the shaker image.  I cut it out with my Boss Kut Gazelle.  Since the numbers are huge, I kept the background simple.  The papers here are from Close to My Heart.  The balloons are from a set I got as a hostess from Stampin' Up! (Bitty Birthday, I think.)  The sentiment is a stamp from Hampton Art.  I coloured the balloons with my copic markers and added some Sakura clear Star glitter to the purple stripes in the centre balloon.

Click to see larger image of glitter shaken around.
I love playing with these cards!  It doesn't just sit on a desk to be looked at.  It is meant to be picked up and shaken around!  Even though the fun only lasts a moment, it is FUN to shake this thing!

Here's the one we will be making tomorrow in my workshop.  It's the version I made with a nested shape.


I hope the ladies have fun with this one.  There's a lot more room to shake the beads around.  I have seen shaker cards filled with various stuff: glitter, shaped confetti, coffee grinds, sand, and seed beads.  I am a little regretful that I dumped my own seed bead collection only two years ago.  I had a lot in many colours.  I had no use for them anymore so I donated them to a children's craft group.  Oh well, SOMEone got good use out of them!


I'm using little microfine glass beads.  It came in a big jar and only a few scoops are needed per shaker.  If I had any alcohol ink refillers or droppers, you could probably also put some in a zip top sandwich bag and colour the clear glass.

Shaker cards are FUN!  Here is another shaker card tutorial by Gina K. Designs.  I love her videos and creations.  One fine day, I will swallow the shipping and get some of their stuff.

Sunday, November 11, 2012

Scrapbook Mini Album - Love (with Video!)

It has taken me a very long time to finish, film and edit my first envelope scrapbook mini album, but it is finally done!  I'm going to keep this one and put anniversary pictures in it.  It's always hardest to part with the first of anything we ever make, isn't it? First, I will show you a few highlight photos and then give a link to a video that walks through all the nooks and crannies of this album.

The whole album is made from scratch using heavy chipboard for the covers and #10 envelopes for the pages.  I came in to a few boxes of business reply envelopes when the firm where I work merged with another firm and the name change made all the paper work obsolete.  I must have at least 2,000 envelopes and this book uses only five!  You can easily accumulate these from the business reply junk mail we all receive.  (I'm saving up some brown ones as we speak!)  Since I have a couple boxes of the white ones, I could make mini albums all the way through to retirement!  (Do you have ideas for paper crafting with #10 envelopes?  I'm all ears!!)

Here is the tutorial of how to make the envelope album: http://www.youtube.com/watch?v=l0aLUKuFAfY  It calls for larger envelopes but the same concept works for any size.

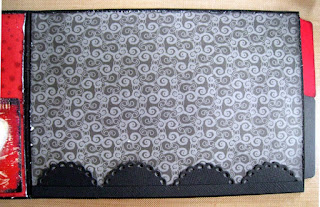
The bulk of my album was made with Basic Grey's "Little Black Dress" line of paper.  I used up some scraps for the rest.  On the cover, I used the gate portion of an Accucut Craft Castle Die to look like a mantle clock.  (With a little alteration, I think this could look like a photo camera too.)


Every page is the same, structurally: a pocket on the left and a full page on the right and a pocket inside the full page.  In each small pocket, I put a tag.  I wanted there to be some larger photo mats in this book that could handle full 4x6 inch regular sized photographs.  The pages themselves are 4 inches tall and 6 inches wide, so a teeeeeeeny amount of trimming of regular sized photos would still be necessary, but minimal.  The rest of the photo spots (on the tags and on the left-side pocket) are all able to hold a wallet sized photo - be it the 2.5 by 3.5 inch size or the 2 by 3 inch size.


You can see on this page the little journaling tags I made.  I made the lines myself with the edge of a ruler.  I saw this tip on YouTube.  Here is the link to the video on how to make your own journaling lines: http://www.youtube.com/watch?v=Iefmf3Uw53g&feature=related

 You can also see my little mini envelope on the right.  I wrote an envelope tutorial for that myself.

I don't have a lacy border die or punch, so I made my own.  Here's my tip on how I made my lace border.  I have a lace scalloped circle die by Lifestyle Crafts (Quickutz).  I used that and cut them in half.


Then I adhered them on a small strip.  No, it doesn't look as good as a true border punch would, but it does the job!


Every envelope page has a tag in it (a total of five double-sided tags).  I used the "Cards - Filing" die from Accucut Craft.  It has the tab on the horizontal edge of the card.  If you watch my envelope scrapbook mini album video, you will see how I was able to move it to the short, vertical edge!


I used stamps from Hampton Art and Close to My Heart in this album.  Stickers were from a love set by Sandylion Stickers.

Sunday, November 4, 2012

Sympathy Verse for Sympathy Card - Give a Poem a Home

Cancer has come creeping in to my extended family - again.  I was surprised to learn that a high percentage of people with cancer who die, actually die from malnutrition and regular illness than the cancer itself.  The loss of appetite causes severe nutritional deficiencies which invites other ailments to the body.  In the end, cancer was the catalyst to that scenario, so cancer gets the blame.

After a battle with lung cancer, which seemed to have spread to the throat, and a bout of pneumonia, my sister's father-in-law succumbed to his ailments last week.  The funeral is tomorrow.  He is survived by his son and two daughters, a wife and step-son and eight or nine grandchildren.

Here is the sympathy card I made for my sister and her husband as well as for his step-mother:


As our own mother passed away from cancer in the year 2000, our extended in-law family for my sister and I have been very important to us.  Her family spends time with me and my in-laws and my husband and I have spent time with her and her in-laws.  It is greatly unfortunate how fast things happen when someone passes.  All the arrangements pile up on top of each other when all you want to do is stop and think and cry a little.

I wrote a little sympathy verse for the card:
We're sorry for the loss you bear
And send this card to show we care.
Do not worry, we all are here
And our support is always near.
Take comfort in knowing you'll always be
Surrounded by friends and family.

To make this card, I saw a tutorial on YouTube.  Here is the original video:
Stamp Pad Direct to Paper Technique

Friday, November 2, 2012

Wedding Scrapbook Layouts from Fall Retreat

I have shown you all the fabulous cards made at our first ever girls (self-made) Scrapbooking Retreat this fall in Southern Ontario.  I also showed you a few scrapbook pages by Anita.  She was working on wedding scrapbook layouts from her friend's wedding.  Well, I was working on some from my own wedding (which was more than 5 years ago)!  I have been working on it off and on for a long time.  I even have the honeymoon pictures and an album to house them waiting for me when I finish!

Anywhoo, here is the first set of wedding scrapbook layouts that I did.  It's the end of the speeches part of the event.
This is my Uncle John.  It surprised me that he wanted to speak at the wedding (which I will journal).  We didn't have any one particularly selected to speak. Typically, the fathers from each side of the newly joined families speak, the best man, the maid of honour and the groom and bride.  Well, my sister and I (maid of honour and bride) didn't want to give a speech.  Everyone else in that set did, but my Uncle asked if he would mind if he spoke.  I had no objections.  It was thoughtful and touching.  What's exciting now is that his own wedding is this December!  He has waited a long time for Mrs. Right and I think he has chosen wisely!

The adjoining page is the best man:

(Also needing to be journalled), he is my husband's cousin but is much closer to a brother.  His family lives more north in Ontario.  As a young man, he came to live with my husbands family in the suburbs of Toronto for a while, so he became more like a brother.  He's a personable guy and likes to talk.  Luckily, he kept his speech quite respectful.

These 5x7 pictures on my 8x8 wedding scrapbook album take up so much space!  All the pictures we ordered from the photographer were 5x7 (or larger).  It leaves me only a little room to embellish (which is fine because then it goes faster!)  In these layouts, I just matched the wedding colour, which was a vivid red.  The red was our ode to the Chinese part of my heritage.

In the next pages, I used a neutral tone to wallpaper the background so the picture colours stand out more.


The last speech was the groom.  My husband is definitely the talker in our relationship!  Kudos to him for his speech.  Most of it was to thank the other speakers and wedding contributors and, of course, an expression of love!

The facing page was our kiss.  We did not want to be interrupted by clinking glasses during the meal (which is what people do to get the bride and groom to kiss).  So, we did one big kiss before dinner.  (I detest when my food gets cold, so I refused to do the kissing game during dinner!)  *Most* people got the point and those that didn't got the evil eye.


Monday, October 29, 2012

Snowman Card for Kards for Kids Christmas 2012

The next card drive for the children at Toronto's Sick Kids Hospital is the 2012 Holiday Card Drive!  For every 5 Snowman Themed cards you send to Kards for Kids for the 2012 Holiday Card Drive, you will be entered to win one of five $20 stamp prizes!

Since I have discovered the youtuber, AuroraInBag, I have been obsessed with using some scraps.  She makes amazing scrapbook layouts from scraps!  When I saw the sketch from Clean and Simple Cards, I knew this was one for me.  I have SO many strips of patterned paper (and ribbon, come to think of it) that would fit this design.  So, here it is: my entry to the Clean and Simple Cards "Fall-To Layout" #213!  Here is the sketch:


And here is my version:

I used my Lifestyle Crafts snowflake embossing folder on the card front and then pulled some strips from my stash.  I used a square punch to nick the ends of the strips into a ribbon cut.  The scalloped circle is also a Lifestyle Crafts die.  I left the die cut in the die and inked the inner circle.  The sentiment is from Stampin' Up!  The epoxy sticker is from the Sandylion outlet store.  I got a whole sheet of them, so I made 5 snowman cards just like this for the Kards for Kids drive.


This is a great way to use scraps!  I have finally started experimenting with shaker cards and I used a variation of this layout to make one, but that's for sharing another day!  I'm going to make some birthday cards with this layout too. SO versatile and so easy.  Thanks to the Clean and Simple blog contributors for sharing their ideas and giving us all some inspiration!

Friday, October 26, 2012

Dog Album for Speaking of Dogs Auction October 2012

The Speaking of Dogs online Charity auction starts today!  Just log on to www.speakingofdogs.com and you will be directed to the auction site. Check the website daily, place your bids, and know that you are helping
a needy dog find that second chance at love and life. All funds raised go directly to veterinary costs and care.


My item in the auction this year is a stitch-bound dog-themed mini album for scrapbooking.  I have previously posted pictures of my dog-themed mini album and also a video of the donated dog scrapbook.

Happy bidding!

Thursday, October 18, 2012

Halloween Cards for Toronto's Sick Kids Hospital

At my last workshop, I accepted donations of cards for the children at Toronto's Hospital for Sick Children as my class fee.  I'm on the Smiley Team for Kards for Kids and that's where all the cards went.  I'd like to showcase what my Creative Crew was able to come up with.  Claire created the most, with 5 cards total.

Witch Hat Halloween Card

This witch hat Halloween card is make with stickers.  How fun is that?  There's a hat on the envelope and some on the inside too with a big orange "Happy Halloween!"  The sentiment on this card is a fancy, iridescent glitter.
Iridescent glitter sentiment
Click for larger view.

On the next pair, Claire used a cool witch stamp and some black cats!

Handmade Halloween cards by Claire 2012

And, one of my favourites, is this embossed jack'o'lantern handmade Halloween card.
Jack'o'lanterns Handmade Halloween Card
Awesome, huh?  A tweensy bit spooky, maybe.  Claire decorated all the insides of her cards too, with a piece of white for writing and a stamped sentiment and stickers.

The last card by Claire is a birthday card.

Handmade Birthday Card

It is bright and bold and beautiful!  I am very grateful for the time and effort Claire has donated to create smiles for the kids!

Tuesday, October 16, 2012

A Charmed Life with Jewellery by Kat

From my last post, we learned that there are many styles of handmade designer jewellery for many moods, occasions, and outfits.  We, as people, are diverse and our accessories tend to reflect that.  Do you ever wonder, however, what our accessories reflect about us?

Jewellery by Kat on iCraft makes a lot of beaded charm bracelets.  (See them at http://icraft.ca/jewelry-by-kat)  What is the attraction to charms, I wonder?  Dictionary.com defines charm, the trait, as “the power of pleasing” and charm, the object, as “something worn or carried on one’s person for its supposed magical effect”.

Silver Clover Leaf Necklace
Silver Clover Leaf Necklace by DistinQue
Apparently, the earliest known charms were carried to ward off evil back in the Neolithic era when hunters would carry interesting stones and trinkets for good luck. The Egyptian Age popularized the wearing of charms around the wrist or neck.  Some charms were protective and woven in to their religious beliefs for the power of pleasing the gods.  Others were status symbols and symbols of social belonging.  Others yet were meant to be used in the afterlife to help identify who you were and guide you safely onward.

Beaded Cross Necklace in Garnet
One of the most recognized “charms” of the modern age is the cross, as seen in Kat's Beaded Cross Necklace in Garnet.  Me calling it a charm might sound offensive to some, but the cross of Christian religions is a symbol of belonging to a certain group, is it not?  It is worn to show your faith: your belief in something extra-sensory that may bring you good fortune like the strength to carry on through hard times or the nobility to do the right thing, for example.

Charms, in fact, have played very prominent roles throughout the ages.  Over a great period of time, however, the primary use of charms has changed.  Queen Victoria is credited with re-popularizing charms as status symbols and aesthetic trinkets.

Eventually, charms became widely commercialized from the elaborate to the plastic gumball machine kind.  In the 1940’s, plastic charms for children were greatly popular.  Children collected ones that came with candy, coveting the rare ones that were pop culture symbols like Disney characters.  Kat, from Jewellery by Kat, believes that children’s attraction to charms stems from the fact that the charms are small and represent things in our world.
Little Girls Red Beaded Charm Bracelet
An example of a Little Girl's Red Beaded Charm Bracelet with lots of little charms of familiar objects.
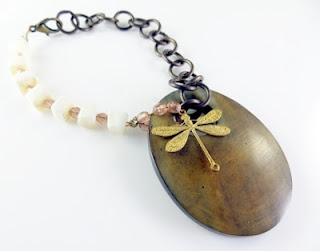
I argue, however, that wearing those symbols shows where you place your favour.  Even in adulthood, this beaded charm bracelet with dragonfly charm by Kat shows outwardly that you like dragonflies or that dragonflies signify something of meaning to you.

Beaded Charm Bracelet with Dragonfly Charm

So then, back to the original question: what do our accessories reflect about us?  Kat finds that each charm is unique.  “They all have something to say. Put them all together on charm bracelet and they have a story to tell.”

(Indeed. The popularity of commercialized charms with children soon evolved into bracelets that served as a record of a girl’s rite of passage from birth, to marriage, to motherhood.)

Kat thinks that the charms we choose do reflect our likes, just like colours and food.  If our mood plays a role in our choice of daily accessory, then that accessory also serves as a sign board of how we are feeling that day.  I’d bet this “cha cha bracelet” (found at http://icraft.ca/handmade/29523/cha-cha-bracelet-with-green-and-aqua-beads.php) in Kat’s jewellery shop reflects your flare.  This beaded bracelet is popping with colour and shimmies and jingles like a dancer on your wrist.  Surely, it is a symbol of extroversion?  What do you think?

Beaded Cha Cha Bracelet with Green and Aqua Beads
I know that, when I was younger, I was drawn to charm bracelets because it felt like I had a lot even though I had only one bracelet.  I grew out of the over-stuffed charm bracelet phase.  I do still like charms, though, only in smaller doses.  I like them hanging from a bookmark or on the front of a photo album for example.  Kat thinks that we never out-grow our love of charms, we only grow up.

Looking back now, perhaps some of the ancient belief in the charm as an object of good luck or protection is subconsciously ingrained in us from our Neolithic days and that extra sensory value of the charm rings truest with us as children.  As we grow and mature, we are still attracted to charms but our deep seeded intuition becomes only a distant whisper.

Sunday, October 14, 2012

Holiday Style Boost with Seaglass Jewellery by JaJeJems!


Learn how to pair jewellery with your own style just in time for all the holiday parties!  If you are like me, you are in dire need of jewellery advice!  I’ve enlisted us some help: Janis and Jessica from JaJeJems on iCraft specialize in seaglass jewellery and wire-wrapped necklaces, bracelets and earrings, and also dabble in lampwork beads.  I think this mother-daughter team has got our bases covered!  Read on for insight on choosing the right handmade designer jewellery to accessorize ourselves and all our friends this holiday season!

A little about our experts:
After her retirement, Janis started to dabble in deconstructing different pieces of jewelry and designing completely new pieces from them.  She has been creating her own designer handmade jewellery for about three years now.  Janis loves pioneering her pieces by experimenting with many techniques and materials, including leather and ribbons.  She even makes her own lampwork glass beads to use in her handmade necklaces, bracelets and earrings.  Janis’ favourite style of jewellery includes simple pieces with a few interesting beads at the neckline or slightly lower to be visible at the top of a sweater or in the neckline of an open blouse.  She adores bracelets and prefers small earrings that don't dangle.  The designer in her, however, likes to play.  Many of her handmade necklaces hang in multiple strands, the bracelets jangle and many little dangling earrings adorn the shop.  Her pioneering spirit is why some of her pieces are asymmetrical or multi-layered!

Jessica studied fashion design at Fanshawe College and spent years of her life working in the Fashion Retail Industry with many of those years being at accessories stores.  Even with two active children, a home sewing and alterations business and being heavily involved with the Home and School Association, Jessica has been designing her own style of handmade jewelry for the past year, including some wire-wrapped seaglass pieces that her mother, Janis, works in to new creations.  Although Jessica credits her mother for her inspiration, the seaglass jewellery collection of JaJeJems was born out of a love of walking the beaches of eastern Canada looking for beautiful pieces of beach glass, each uniquely etched by the waters beyond the shores.


I posed a series of questions to our experts to help me understand the nuances of choosing the right jewellery in the right situation.  When asked about the perfect mix of jewelry to have, whether you need different sets for different occasions or whether any handmade bracelets, necklaces and earrings are truly “jack of all trade” pieces, this is the insight they had to share:

Janis: "I think that depends very much on the individual.  We often have customers approach us looking for something special just for a certain outfit or occasion.  Others are looking for more versatile pieces that can be worn with many outfits or on different occasions.  I think wearing the same piece of jewellery for dressing up as you do for casual wear is a lot more common than used to be."

Jessica: "I truly believe that people buy jewellery based on mood more than anything. Maybe an outfit plays into it for special occasions but in my experience the more flexible the piece, the better. I think you really need to have an overflowing jewellery box and keep adding pieces so you always have the right one to suit the day and the outfit."


I asked if buying jewelry in a set, as with their crocheted bead bracelet and drop earrings or mixing and matching separates is the way to go.

Janis is not as convinced that people really want matching sets anymore.   She reports, “I often hear customers say that they love bracelets but never wear necklaces or prefer wearing the same understated earrings with every outfit.  Others are looking for big bright earrings and that's all they are interested in buying to accessorize their wardrobe.  For our business we are leaning towards giving customers the option of choosing pieces from our collection that have similar beads or complimentary colours to other pieces.”

Makes sense to me.  When you apply make-up, the general rule is to play up one thing and make the others more demure like having smoky eyes and subtle lipstick, or bold lipstick and subtle eyes.  Why would it be any different for accessories?


What about putting it all together with an outfit though?  I gave a few examples of holiday party wear possibilities: a little black dress, a sparkly red one or a demure smooth satin gown.  I was pleased to learn that JajeJems has a set that would work for all of them!  Their sophisticated lady beaded choker necklace and earrings set pictured above is a classic fit for any occasion or get together!


On the other hand, their black and white lampwork bead necklace that captures the tug and sway of windy shores is perfect for the little black dress but less suitable for the others.  I suppose the lesson is to wear what suits YOU first and your outfit after.  If you feel like being bold and sparkly, go for it!  If you feel like being seductively understated, go for that!

Well, how about buying for someone else?  How do you know what to get someone?

Janis has this advice to offer: “Buying jewellery for someone else can be a tricky business. You will want to observe the style of jewellery that the person usually wears, their favourite colours, whether they like big, chunky jewellery or smaller pieces.  Are they tall or short?  A 24 inch necklace may hang perfectly on a tall person but be too long for a short person. Do they have a large wrist or small? Looking for pieces that are adjustable to a variety of lengths can help with this problem.”

As examples, the lampwork necklace mentioned earlier is great for casual wear, the office or a little black dress whereas this soft and cool seaglass bracelet in green and white might better suit someone who wears jewellery with anything from blue jeans to a sundress but, as Janis points, out, "... of course, it has to be someone who likes bracelets!"


It may be easier than you think to get cues from women now that you know what to look for.  Make a mental note of their favourite colours, the most frequent styles (open neck, high neck, jeans, skirts, dangling earrings or studs) from their everyday wear.  Men, on the other hand, may be harder to get cues.  What do we do about those ever-so-hard-to-buy-for men?  When asked this question, here is what they had to say:

Jessica: “Men are a tough one. On the East Coast it is pretty much unheard of (even mocked) for a man to wear jewellery. I did a craft show with my mom here and more than one women giggled at the idea of her “man” wearing a bracelet. In Central Ontario, it wasn’t at all unusual to see men with necklaces or bracelets.  I’m not sure if it is regional and/or cultural?”

Janis: “They either love jewellery or wouldn't be caught dead in it!  And most of the time they surprise us with what they like.  I do believe that men are much pickier than women about the accessories that they choose.  On the other hand they are more likely to purchase a handmade jewellery item for themselves on impulse, especially when they find a piece that they really like.  It isn't that they put less thought into a purchase but they are not as likely to go away to think it over once they see something that they like.”


JajeJems has been working on a some jewellery designs for men this season, using stone, bone and metal beads, strung on leather cord. So far, they have focused on masculine colour schemes and pieces with more substance.  The man’s beaded leather bracelet in the seafarer collection pictured here is an example.  I love the blue in this bracelet!  It's rich and mature.  So far, the designers have had a positive response from several male family members and friends!

I guess this is why there are so many choices for jewellery in the world.  There isn’t any single factor that defines what necklace or what bracelet or earrings *must* be worn with particular styles or fashions.  It’s more of a “right time and right place” sort of thing.  The piece must fit the person, the mood, the occasion and the general flow or feel of the outfit of the day.  I suppose the lesson is that buying handmade jewellery this holiday season almost *can’t* go wrong!  There will be a time and place for everything, so go ahead and buy it and its day will come!

Friday, October 12, 2012

Lara's Non-Traditional Christmas Cards

My sister, Lara, likes to do her own thing when we get together to craft.  She is always trying to find a way to be individual.  She really enjoys colouring the stamps so she spent most of the time at our craft retreat experimenting with colours and techniques.

By the end of our weekend, she had four cards and a scrapbook page completed.


She stamped the little elephant and coloured it with her Promarker Aquapainters.  She had made a couple of elephants and a dinosaur for me too a while ago.  I used the photo in the bottom right in my album too and I used one of her stamped images as well!  Great minds think alike!
Here's an example of how my sister likes to think outside the box.  She has a cute little dragon valentine stamp (we both have it, actually).  The dragon's smoke tendrils in the stamp come out in the shape of a heart.  She changed it up to make it work as a Christmas card:

(Click photo for larger view.)

Here are the rest of her hand stamped cards.  One of them has a unicorn.  The colours of the unicorn matched the paper really well.  The paper design looks like Christmas ornaments, so the card works as a non-traditional Christmas card.  (Sorry the photo is crummy - it was the last one taken before everything got taken out the door to the waiting cars!)
(Click photo for larger view.)

Even on the card we made in our Stampin' Up! class with Jodi, she changed the ornaments she used to make it a double instead of a single like the class sample.

I think she enjoyed her chance to pull out all the supplies and experiment without the worry of little hands getting in and making a mess.  Over all, everyone had a fabulous, relaxing time at the retreat and each made it what they wanted to!