Showing posts with label shadow box. Show all posts

Sunday, March 27, 2022

Shadowbox 50th Birthday Card

One of our friends turned 50 this month, so I wanted to make him a special card. This is a true milestone for him and needed to be celebrated! I used the same template I made for my mother-in-law's birthday card (here: alcohol inked shadowbox birthday card). For that card, I inked up the whole sky with an alcohol ink technique.

For this one, I did regular ink blending with blending brushes.
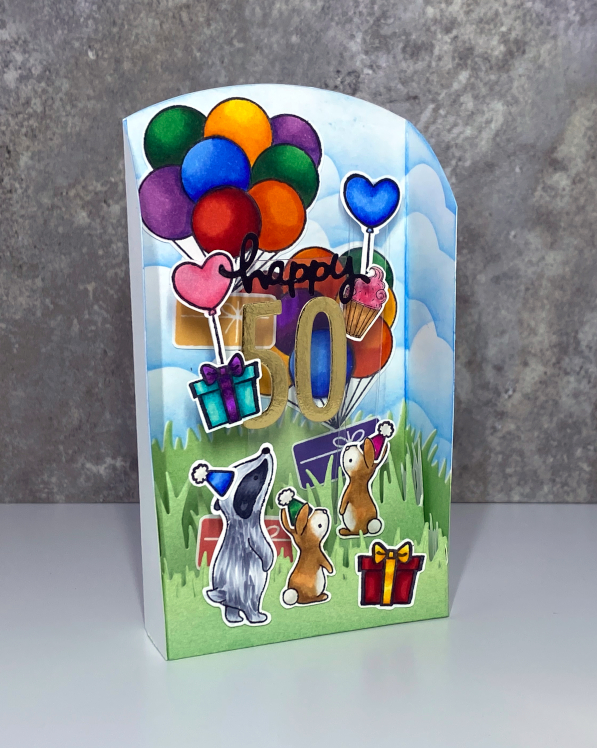
 

Everything on this card started out as white cardstock. I used a grass mask by Lawn Fawn to make the grass line in the back. I used my homemade cloud stencil for the sky. The grass in the middle layer is a long grass die cut that I ink blended and the front layer is a short grass die cut that I also ink blended. 


Then I stamped the critters and coloured them with my alcohol ink markers and cut them out by hand. I dug into my stash to make this card! There's a whole medley of stamp sets! (It actually took quite a long time to make this card.) All the critters are from a Hello Bluebird stamp set. I found two gift stamps: a solid one and one I had to colour in. I used a Your Next Stamp balloon cluster image and I found a single balloon in another stamp set. I forget what stamp set the party hats are from, but boy they were REALLY TINY to colour in!


I knew I wanted a large 50 to be floating in the middle. I used acetate for that. Since cleaning my craft room, I put all my "leftover" bits (e.g. die cut but not used, stamped but not used, etc.) in what I'm calling my "bits box". So I dug in there and found the cupcake. I coloured that up and put it in!

I put a pocket on the back and wrote out a little poem for a sentiment on a separate sheet that I slipped into the pocket. I like how it turned out and our friend liked it too! I think it turned out fine for guys or gals, so I'm very happy with it!


Thursday, December 23, 2021

Shadow Box Birthday Card - Alcohol Inked Background

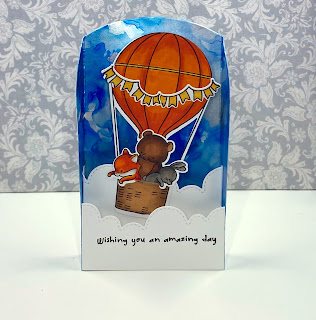
I made my MIL a birthday card this year using a brand new stamp and die set I acquired from Hello Bluebird. I love their storybook line art. I don't normally go for the dies, but I did for this one because the hot air balloon does cut out inside the strings. I have been looking for a good hot air balloon die forever! I think a hot air balloon is perfect for both feminine and masculine cards.

I modeled the shape of this card from a video by Jennifer McGuire (here: 3D Display Cards - Many Sizes!). I made some templates for different sizes of these arch-topped shadowbox cards using a few of my arched Accucut Craft dies. I show the die used for this one in my video (linked below). However, you could use a plate to round the top of your shadowbox.

I coloured my images with Copic markers. Not thrilled with how the balloon turned out. I need to look up how to colour that rounded shape. Not only is the whole balloon rounded but also each of the panels has a curve.

Besides the stamp set, the main feature on this card is the background sky. I made it myself with my alcohol inks. I recorded the process in a video posted here:

Alcohol Ink Background Sky


I share a tip on how I get the look of alcohol pearl inks without having any pearl inks! I hope you try out some alcohol inky backgrounds yourself. Come share in the comments if you do.

Friday, November 6, 2020

Bridge Cards for the Holidays

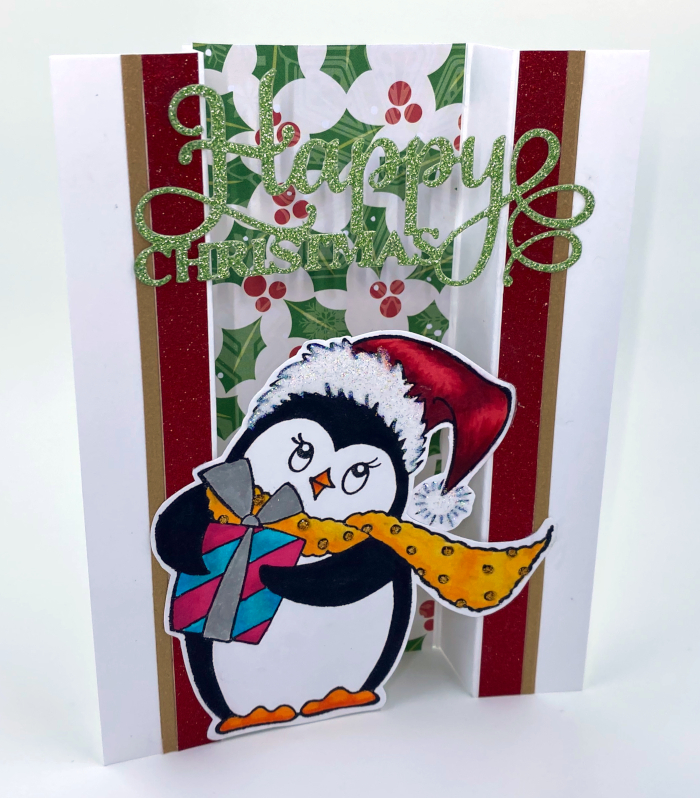
 I was inspired by the talented and clever Jennifer McGuire to try my hand at some bridge cards. [Click to see her bridge cards.] I don't like tent fold cards because they flatten out when you try to display them. Therefore, I rarely make cards in landscape orientation. These bridge cards create a way for cards to stand freely, no matter the orientation!

I worked out dimensions different from Jennifer's so that I could maximize the writing space on the backs. I started with some portrait orientation slimline (or tall skinny) cards. The door wasn't quite wide enough to span the gap, so I put a banner behind it. The one with the row of houses was definitely much easier. I really like how Santa and his reindeer turned out. They are from the North Pole Littles stamp set by Hello Bluebird who have such sweet storybook style images. I mounted them on acetate and then strung paper twine between them to be the reigns. (And, of course, there is glitter on Santa's hat!)

These are how the landscape versions of A2 (4.25 x 5.5 inch) cards turned out.


I used a heat embossed Christmas tree stamp and coordinating die, plus a die cut sentiment to span the gap. On the silver tree, I used multi-colour homemade enamel dots as the ornaments (or baubles).

Then I tried it in portrait orientation. This tree has white blizzard Nuvo drops as the baubles. I die cut the sentiment three times from thick cardstock, layered it up and then die cut it from silver glitter cardstock for the top most layer.

I finally have a way to use some of my GIANT stamps! They can span the gap on these cards! This penguin is sweet, but so big. My sister has a similarly big snowman stamp. So great to find ways to use what we've got!


These bridge cards are truly economical on patterned paper. What a fantastic way to use up scrap strips in the centre panel! The downside to it, thought, is that the portrait versions have such a narrow space on the back to write. There really isn't a lot of room. I could put a tent-fold flap back there to create more room, but I decided to work out the dimensions for "open front" shadow box cards (as opposed to diorama-style cards with a framed window, like I made before). These achieve the same dimensional effect but offer more writing room on the back than the bridge cards. This one isn't quite the one I was aiming for. I will try some more where the "front bench" is really a scene that spans the gap. But this was the one I made to test the sizing.


Have you started your holiday cards?? With the postal service expecting to be more overwhelmed than normal, we'd better aim to get our cards in the mail earlier than normal. (I'm always late to the post office with my holiday cards. To be truthful, I probably will be again this year, despite the best of intentions!)

Wednesday, December 11, 2019

Floating Element Aperture Card - Winter Birthday

I needed to make my mother-in-law a birthday card. I saw a tutorial by Mixed Up Craft. In her spinner version tutorial (that I linked), she links back to her floating element tutorial. I don't like square cards, so I made the 5 x 7 version but used the popped up sentiment bit from the spinner version.


It's basically a twist on a regular shadow box card. Instead of putting the aperture on a flat side of the box, you put it on the corner. That allows you to use acetate to "pop out" of the aperture and to have the sentiment to the same with a very clever "bridge" piece behind it.
You end up with this clever diamond shaped card that folds perfectly flat for mailing. Love it! I've already figured out the dimensions for an A2 version too.
I used my Nuvo Embellishment mousse on some cardstock and then cut the snowflakes out. I wanted to add just a touch of shine. The gifts are made from paper scraps. I love using my scraps to make gift boxes for cards. It works for birthdays and Christmas!


I think I will be making more of these! I think I will go ahead and figure out the dimensions for a landscape version of both sizes. The A7 will have to be constructed out of a front and back piece but the A2 can fit on a single piece of paper. To be honest, now that I think about it, I think a two piece construction might be simpler anyway, so it's easier to figure out what outside and inside areas need paper!

So many possibilities with this design!  I hope you are inspired too!

Monday, April 16, 2018

Acrylic Smash Galaxy Background with Nuvo Embellishment Mousse

I posted a card I made for my nephew with a dragon making birthday wishes among the stars. Here, I share the video of how I made that background.

I started with blobbing colours of Nuvo embellishment mousse onto plain white cardstock. Then I diluted black ash Nuvo mousse with water on a piece of acetate (since I don't have a round acrylic block) and smooshed it on to the paper. Many times. Lots of smooshing.
The one of the left is the Nuvo Mousse one. The one on the right has dye ink underneath the black ash Nuvo mousse. I have a stronger teal colour ink dye in than the Nuvo aquamarine. (I have since acquired the Nuvo teal mousse.)

If you don't remember, here's the card I had made with it.

Click to watch this video on YouTube!


This was the best result so far, but also the messiest. My next, and last, experiment used mousse and alcohol ink. It was a tiny bit less messy but I liked the results much much more! I'll be back to show that one sometime in the future.

Thursday, February 1, 2018

Wish on a star birthday card

One of my nephews is having a birthday! What do we do on birthdays? Make wishes! Since I have been playing around with galaxy-making techniques with my Nuvo embellishment mousses, a galaxy background was perfect for this "wish on a star" card.

I also love LOVE LOVE my dragon stamp set from Kraftin' Kimmie. So, I played with my Nuvo mousses for that too! I watercoloured with it. I even dyed the platinum mousse green with regular dye-based ink. My nephew's favourite colour is green, so I had to make sure the dragon was green and the card was green. (Video of colouring the dragon coming someday!)

You can see the galaxy background better here.
This galaxy background piece came from my acrylic smash galaxy experiment. (Video coming someday!) While I'm not a huge fan of the sentiments in this stamp set, the dragons are just adorable. I paired it with another sentiment I have. I did well to use some older goodies on this card too: I die cut the candles from a (very) old Quickutz die I have and I even used deco-edge scissors to create my clouds!

I really enjoy these Nuvo embellishment mousses by Tonic Studios. Water colours test my patience and the "permanent when dry" feature is a huge plus for me. I would hate to spend so much time watercolouring something only have a rainy day destroy it while being delivered in the mail. (I use cellophane bags to mail stuff to protect against that!) Just LOOK at the shiny goodness of the mousse!

I coloured the dragon on Strathmore Bristol Smooth paper. All the big name YouTube cardmakers (Jennifer McGuire, Kristina Werner, Prairie Paper & Ink, and Michelle from the Card Grotto) have said good things about this paper, so I finally shelled out some $$ to try some. My, did it ever hold up well to being watercoloured AND heat gun dried! Very little warping. (Part of that might be because the Nuvo mousse dries really quickly too.) Money well spent!

Here's a look at how you achieve the dimension in these diorama cards.

I hope my nephew likes it! I composed a little poem on my computer, printed it and adhered it to the back.


What supplies have you been having fun with lately?

Monday, December 25, 2017

Christmas Diorama Cards

Merry Christmas!

This year, I made several shadow box cards or, more properly named, diorama cards. These are little 3D scenes. The cards fold flat for mailing but pop into a box shape to display its dimension. These ones were A6 sized (6.25 x 4.5 inches when flat).

These are the first three I made.

I used a bunch of new purchases on these cards: The snow globe (by Creative Expressions), the village (by Your Next Stamp) and the snowman (by Yvonne Creations with birch trees from Lawn Fawn).

The penguin was the easiest (penguin stamp by Close to My Heart). I did stamp the snowflakes in the background. If I used patterned paper, I could have made the card faster.

I loved the snowman but it took the longest by far. It cut and embossed the bits but it was one solid colour. I coloured all the bits with my Copic markers. It was not easy to achieve definition in the snowman's body. It was also not easy to leave the thin lines in the snowman's hat. If I do that one again, I might try paper piecing the scarf and hat. The village was the most colourful, so I chose to make many more of that one.

On the next version of the village, I used Snowtex on the houses and trees. Snowtex is an opaque, bright white, textured medium. It dries hard and reminds me of popcorn ceiling plaster.


To show you the 3D nature of the card, here's the top view where you can see the 4 layers achieved with 2 benches between the front and back of the box.

You can see some of the dimension in this picture:

The last version I made for this year included my new Creative Expressions woodland creatures stamp and dies set, plus my Lawn Fawn birch trees. I made this one for my mother-in-law who likes deer. It took too long to colour the deer and trees so I only made a couple of those.

I really enjoyed making these cards this year. I will have to make some more in different themes.

I wish everyone a healthy, happy Christmas time and a prosperous new year!

Sunday, August 6, 2017

Taught my first Shadow Box Card class!

Last post, I showed you the first shadow box card I ever made. That was experimentation to figure out the dimensions to use for a shadow box card class. In class, we made two "versions". Both cards are the same size and orientation. However, one has an inside full panel, like the anniversary card I made (except the anniversary card had 2 inside panels). One has a shaped "wall" inside, instead of a whole panel.

Here's the paneled one.
I was going to put a cupcake inside - and I may still make that variant, but when I was leafing through my stamps, I found my trusty monster. I really love this guy! Since he was holding a balloon, it went well with this card! I coloured him with my alcohol markers.

So, the balloons are out front, with their twine strings, the gifts are in the middle layer and the monster is in the back.
And, since it was July when we had the class, it was time to start on the holiday cards! So, here's the shadow box card I made with a partial wall, instead of a whole panel for the middle layer:
I also bought a cheapo paint brush to do the snow speckling more cleanly (for my fingers) than the toothbrush method.
I love the look of the silver glitter trees! You can see the hill in the middle is the half panel and the house was stamped, cut out, and placed on the back wall of the card.

I especially like that these fold flat for mailing!
Do you have a favourite type of 3D handmade card? What is it?

Saturday, July 1, 2017

Happy 150th to Canada and Happy 50th to a family friend!

50 years ago, on Canada's 100th birthday, some friends of ours got married. (You know who you are!) I made this shadow box card for you with the measurements I worked out myself (for our next class!). I made this card specifically for you (and it took me ALL DAY):

I put 5 roses on the front - one for each decade of your marriage.
I put 3 hanging hearts on the next layer - one for each of your lovely three sons.
I put 3 blue dots on the next layer - one for each of your lovely three grandsons.

And course, you two are in the centre!

There are three layers of frames on this one, each with a different shape. I didn't have any nesting dies that really fit the bill. I used blue in the middle because (I was told) that was the wedding colour.
I made a frame for the back to stick on the little anniversary poem I wrote. It folds completely flat to fit in an envelope. That's where the math came in. I had to make sure the flat dimensions were right for the envelope. This card went in a 5 x 7 inch envelope.

I was pleased with how it turned out. I hope our friends were too!