
Got scraps? Make memo pads! I made almost 30 DIY notepads for administrative professional's day. I used plain copy paper cut to size, tissue boxes for covers, and paper scraps for embellishments.

I have a video walkthrough of all the ones I made (minus 2 smaller ones that in had to pop in the mail before filming).
I got the copy paper free and, for my favourite 2 sizes, 10-12 sheets makes 3 pads of 20-24 pages. The pads themselves are very easy to make with loads of video tutorials readily available. Since I am klutzy with a glue gun, I used the slower, Elmer's glue method. I have no idea if these pads will hold up to having sheets torn out or will split into pieces part way through. Only one way to find out - USE them!
What I like about them is that, for cardmakers, when your pad is all done, you can trim the front covers to a smaller rectangle and use it as an embellishment on a card!

I tried to keep all the sentiments positive and happy thoughts.

I even did a little DIY on some embellishments. I made these faux enamel dots with cardstock, gold nail polish, glossy accents (glue) and good ol' scissors.

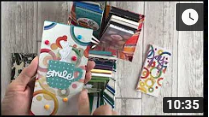
Want to see them all? Click the picture below to go to my YouTube channel to see them!

I have a video walkthrough of all the ones I made (minus 2 smaller ones that in had to pop in the mail before filming).
I got the copy paper free and, for my favourite 2 sizes, 10-12 sheets makes 3 pads of 20-24 pages. The pads themselves are very easy to make with loads of video tutorials readily available. Since I am klutzy with a glue gun, I used the slower, Elmer's glue method. I have no idea if these pads will hold up to having sheets torn out or will split into pieces part way through. Only one way to find out - USE them!
What I like about them is that, for cardmakers, when your pad is all done, you can trim the front covers to a smaller rectangle and use it as an embellishment on a card!


I even did a little DIY on some embellishments. I made these faux enamel dots with cardstock, gold nail polish, glossy accents (glue) and good ol' scissors.

(Click picture for larger view.)
Want to see them all? Click the picture below to go to my YouTube channel to see them!


