Sunday, November 25, 2012

More Snowmen Cards for Kards for Kids

Kards for Kids is hosting a Christmas Card Drive Contest:  For every 5 cards you donate for the children at Toronto's Hospital for Sick Children, you have a chance to win a rubber stamp from amazing stamp companies: High Hopes stamps, Your Next Stamp, Kraftin Kimmie Stamps, Close to My Heart and Michaels.

This year's theme is snowmen.  I already made a set of snowmen cards with some stickers from the Sandylion Outlet store in Markham, Ontario.  I have now made another set, this time using a holiday paper stack from Die Cuts with a View.


Who says the focal point has to be a snowman?  There are two snowmen in the patterned paper, so I made the sentiment the focal point.  The sentiment reads: "It's the most wonderful time of the year."  It's from a set of holiday sayings by Stampendous.  I also used some old ribbon I had from Michaels Craft Stores that says "warm wishes".


I like this card (and the overall snowman theme) because it is winter-specific but not Christmas-specific.  When donating cards to Toronto's Hospital for Sick Children, you don't know what the background or ethnicity of the children are.  This makes it easier for the nurses to select and hand out cards.

I have left the insides blank.  Some of these cards are filled out by the nurses for the children, but I think some are also filled out by the children for the doctor's and nurses.  Using a more general winter theme makes the cards more versatile for whatever need for them exists.

Thursday, November 22, 2012

Thank-You Note Cards


In the spirit of US Thanksgiving, I thought I would tell a little tale of gratitude.

I went to some training for work in October.  It was "new manager orientation".  Since I have been a manager for a few years, I remember saying to another manager attending, "If I learn anything at this course, then I've been a bad manager!"  Lo and behold, it was not about the work or the workflow as much as it was about the soft skills.  Soft skills are so rarely well trained.  Long story short, I was impressed by the content I had not expected.  None of the ideas themselves were new to me, but the best take-away from it was the real world application.  Implementation is always where the greatest of plans and intentions fall down.  This course was full of implementation guidance and that's where the real value was.

I am thankful that the firm where I work invests in its people's soft skills.  Working in a service industry, people are what make your firm go round and not just the people you service, the people you employ too.  Even before we merged, I once had trouble with a client and I had been struggling with either bringing it up or quitting because quitting was easier.  The partner first thanked me for trusting him enough to come forward with the matter.  He said, "I would never want to lose a good employee over any client.  There are always more clients to get, but if I don't have good employees, I don't have a business."

I am lucky to work in a firm where people matter.  Sure, some days I feel like I don't matter and I sense my replace-ability more closely.  Sure, there are days when it really is only about "getting it done".  Those days, thankfully, are the minority.  The value of the people is constantly reinforced and that corporate culture is what has kept me in place for more than a decade.

Back to the soft skills course...
The key speaker mentioned in one of his many real world examples, that he likes to reward his clients with a real thank-you card: just a little note to connect with another person and remind them that they are important to him.  I decided right then that I was going to make little thank-you cards for the two key speakers and send them to them to give to clients or employees or whomever their hearts desire.

So, I rifled through my strip scraps and came up with the following designs: Simple, effective, masculine (since they are coming from men).

Click for larger view.
The leaves are a Hampton Art set I got at Michael's on sale.  The sentiment is Stampin' Up!  I used a border punch on a few.

Click for larger view.
In my last Christmas card to my pre-merger firm, I wrote in it a note of thanks for training me from scratch all through University, trusting me with challenges, and providing me guidance from mentors who actually are interested in seeing you develop.  I don't know what I'm going to do this year yet, but I still have a month or so to figure it out!

Saturday, November 17, 2012

Shake it, baby! A Birthday Shaker Card

A co-worker of mine turned 60 yesterday.  He has been mentoring me at work since the day I started, over 12 years ago.  He continues to take pride in his work and has great attention to detail.  I wanted to make him a special card.  My latest craze is making shaker cards.  It can be work, but you can make the shaker from any shape or size.  What held me back for so long was not having nested shapes like in the shaker card tutorial on Splitcoast Stampers that I first saw.

I finally obtained some from Stampin' Up! (nested labels) and made a card.  Then I saw another shaker card tutorial from Lynn Ghahary on Two Peas in a Bucket where she used a punch on a shape.  Eureka!  You don't need nested shapes.  You just need something with a window (of ANY shape) cut in it.

So... why not the zero in 60?


The 60 had to be pretty huge to fit the shaker image.  I cut it out with my Boss Kut Gazelle.  Since the numbers are huge, I kept the background simple.  The papers here are from Close to My Heart.  The balloons are from a set I got as a hostess from Stampin' Up! (Bitty Birthday, I think.)  The sentiment is a stamp from Hampton Art.  I coloured the balloons with my copic markers and added some Sakura clear Star glitter to the purple stripes in the centre balloon.

Click to see larger image of glitter shaken around.
I love playing with these cards!  It doesn't just sit on a desk to be looked at.  It is meant to be picked up and shaken around!  Even though the fun only lasts a moment, it is FUN to shake this thing!

Here's the one we will be making tomorrow in my workshop.  It's the version I made with a nested shape.


I hope the ladies have fun with this one.  There's a lot more room to shake the beads around.  I have seen shaker cards filled with various stuff: glitter, shaped confetti, coffee grinds, sand, and seed beads.  I am a little regretful that I dumped my own seed bead collection only two years ago.  I had a lot in many colours.  I had no use for them anymore so I donated them to a children's craft group.  Oh well, SOMEone got good use out of them!


I'm using little microfine glass beads.  It came in a big jar and only a few scoops are needed per shaker.  If I had any alcohol ink refillers or droppers, you could probably also put some in a zip top sandwich bag and colour the clear glass.

Shaker cards are FUN!  Here is another shaker card tutorial by Gina K. Designs.  I love her videos and creations.  One fine day, I will swallow the shipping and get some of their stuff.

Sunday, November 11, 2012

Scrapbook Mini Album - Love (with Video!)

It has taken me a very long time to finish, film and edit my first envelope scrapbook mini album, but it is finally done!  I'm going to keep this one and put anniversary pictures in it.  It's always hardest to part with the first of anything we ever make, isn't it? First, I will show you a few highlight photos and then give a link to a video that walks through all the nooks and crannies of this album.

The whole album is made from scratch using heavy chipboard for the covers and #10 envelopes for the pages.  I came in to a few boxes of business reply envelopes when the firm where I work merged with another firm and the name change made all the paper work obsolete.  I must have at least 2,000 envelopes and this book uses only five!  You can easily accumulate these from the business reply junk mail we all receive.  (I'm saving up some brown ones as we speak!)  Since I have a couple boxes of the white ones, I could make mini albums all the way through to retirement!  (Do you have ideas for paper crafting with #10 envelopes?  I'm all ears!!)

Here is the tutorial of how to make the envelope album: http://www.youtube.com/watch?v=l0aLUKuFAfY  It calls for larger envelopes but the same concept works for any size.

The bulk of my album was made with Basic Grey's "Little Black Dress" line of paper.  I used up some scraps for the rest.  On the cover, I used the gate portion of an Accucut Craft Castle Die to look like a mantle clock.  (With a little alteration, I think this could look like a photo camera too.)


Every page is the same, structurally: a pocket on the left and a full page on the right and a pocket inside the full page.  In each small pocket, I put a tag.  I wanted there to be some larger photo mats in this book that could handle full 4x6 inch regular sized photographs.  The pages themselves are 4 inches tall and 6 inches wide, so a teeeeeeeny amount of trimming of regular sized photos would still be necessary, but minimal.  The rest of the photo spots (on the tags and on the left-side pocket) are all able to hold a wallet sized photo - be it the 2.5 by 3.5 inch size or the 2 by 3 inch size.


You can see on this page the little journaling tags I made.  I made the lines myself with the edge of a ruler.  I saw this tip on YouTube.  Here is the link to the video on how to make your own journaling lines: http://www.youtube.com/watch?v=Iefmf3Uw53g&feature=related

 You can also see my little mini envelope on the right.  I wrote an envelope tutorial for that myself.

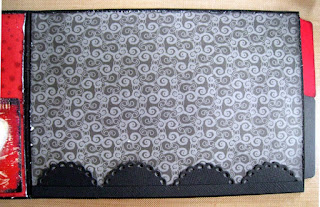
I don't have a lacy border die or punch, so I made my own.  Here's my tip on how I made my lace border.  I have a lace scalloped circle die by Lifestyle Crafts (Quickutz).  I used that and cut them in half.


Then I adhered them on a small strip.  No, it doesn't look as good as a true border punch would, but it does the job!


Every envelope page has a tag in it (a total of five double-sided tags).  I used the "Cards - Filing" die from Accucut Craft.  It has the tab on the horizontal edge of the card.  If you watch my envelope scrapbook mini album video, you will see how I was able to move it to the short, vertical edge!


I used stamps from Hampton Art and Close to My Heart in this album.  Stickers were from a love set by Sandylion Stickers.

Sunday, November 4, 2012

Sympathy Verse for Sympathy Card - Give a Poem a Home

Cancer has come creeping in to my extended family - again.  I was surprised to learn that a high percentage of people with cancer who die, actually die from malnutrition and regular illness than the cancer itself.  The loss of appetite causes severe nutritional deficiencies which invites other ailments to the body.  In the end, cancer was the catalyst to that scenario, so cancer gets the blame.

After a battle with lung cancer, which seemed to have spread to the throat, and a bout of pneumonia, my sister's father-in-law succumbed to his ailments last week.  The funeral is tomorrow.  He is survived by his son and two daughters, a wife and step-son and eight or nine grandchildren.

Here is the sympathy card I made for my sister and her husband as well as for his step-mother:


As our own mother passed away from cancer in the year 2000, our extended in-law family for my sister and I have been very important to us.  Her family spends time with me and my in-laws and my husband and I have spent time with her and her in-laws.  It is greatly unfortunate how fast things happen when someone passes.  All the arrangements pile up on top of each other when all you want to do is stop and think and cry a little.

I wrote a little sympathy verse for the card:
We're sorry for the loss you bear
And send this card to show we care.
Do not worry, we all are here
And our support is always near.
Take comfort in knowing you'll always be
Surrounded by friends and family.

To make this card, I saw a tutorial on YouTube.  Here is the original video:
Stamp Pad Direct to Paper Technique

Friday, November 2, 2012

Wedding Scrapbook Layouts from Fall Retreat

I have shown you all the fabulous cards made at our first ever girls (self-made) Scrapbooking Retreat this fall in Southern Ontario.  I also showed you a few scrapbook pages by Anita.  She was working on wedding scrapbook layouts from her friend's wedding.  Well, I was working on some from my own wedding (which was more than 5 years ago)!  I have been working on it off and on for a long time.  I even have the honeymoon pictures and an album to house them waiting for me when I finish!

Anywhoo, here is the first set of wedding scrapbook layouts that I did.  It's the end of the speeches part of the event.
This is my Uncle John.  It surprised me that he wanted to speak at the wedding (which I will journal).  We didn't have any one particularly selected to speak. Typically, the fathers from each side of the newly joined families speak, the best man, the maid of honour and the groom and bride.  Well, my sister and I (maid of honour and bride) didn't want to give a speech.  Everyone else in that set did, but my Uncle asked if he would mind if he spoke.  I had no objections.  It was thoughtful and touching.  What's exciting now is that his own wedding is this December!  He has waited a long time for Mrs. Right and I think he has chosen wisely!

The adjoining page is the best man:

(Also needing to be journalled), he is my husband's cousin but is much closer to a brother.  His family lives more north in Ontario.  As a young man, he came to live with my husbands family in the suburbs of Toronto for a while, so he became more like a brother.  He's a personable guy and likes to talk.  Luckily, he kept his speech quite respectful.

These 5x7 pictures on my 8x8 wedding scrapbook album take up so much space!  All the pictures we ordered from the photographer were 5x7 (or larger).  It leaves me only a little room to embellish (which is fine because then it goes faster!)  In these layouts, I just matched the wedding colour, which was a vivid red.  The red was our ode to the Chinese part of my heritage.

In the next pages, I used a neutral tone to wallpaper the background so the picture colours stand out more.


The last speech was the groom.  My husband is definitely the talker in our relationship!  Kudos to him for his speech.  Most of it was to thank the other speakers and wedding contributors and, of course, an expression of love!

The facing page was our kiss.  We did not want to be interrupted by clinking glasses during the meal (which is what people do to get the bride and groom to kiss).  So, we did one big kiss before dinner.  (I detest when my food gets cold, so I refused to do the kissing game during dinner!)  *Most* people got the point and those that didn't got the evil eye.