Saturday, July 24, 2010

Give a Poem a Home: An Owie on the Noggin


Almost two weeks ago now, my youngest nephew who was 2 and a half months old (age-corrected for being born premature, he was really only 2 or 3 weeks old) got an owie on his head.  Let’s just leave it at: there was a bottle warming accident.  It was horrific at the time because it seemed everything in the world had suddenly gone so wrong once the accident happened.

The good news is that he is totally fine now.  He has a light scar in one place and still a scab in another which might also scar.  These scars are very small and fairly faint, so I am confident they will fade with time and, by the time he is five years old, they might be completely erased.

I felt terrible that it happened in my house while my sister was visiting.  I had to make a card for him as I imagined he must be so uncomfortable.  (Within a couple days, though, I don’t think he was as uncomfortable as I still imagined.)  I searched for “get well” digital stamps since digital stamps have immediate delivery through email and I wanted an image fast.  I found a lot of really cute baby stamps, but not so many get well ones, but this one was perfect:

My nephew’s owie is on his head, concentrated around the left ear, so the bear kissing the bunny’s head on that side was oh so perfect!  This image is a digital stamp by Diane Carubia on Di’s Digital Downloads.

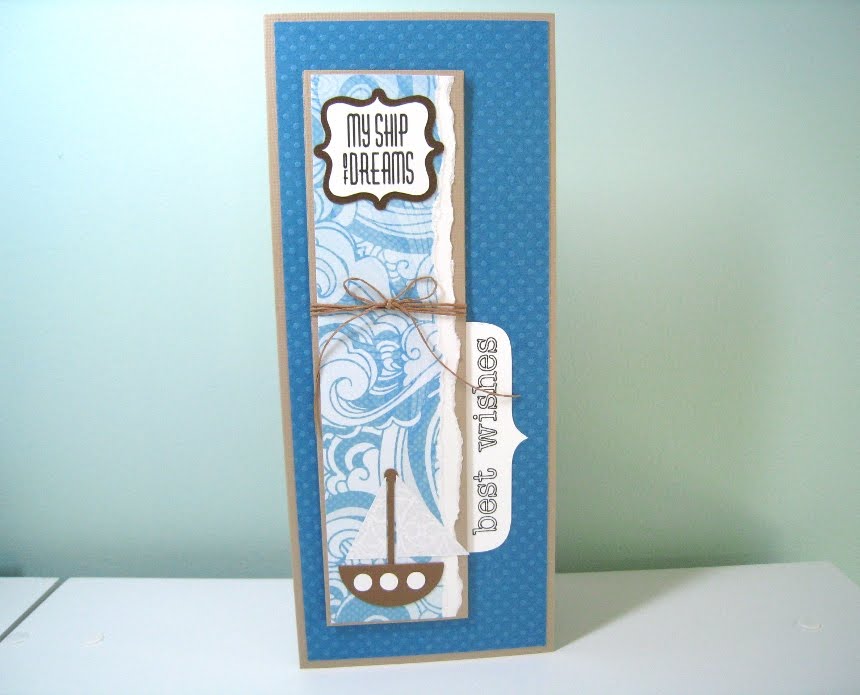
I follow her blog and I noticed she has a label for Get Well, so I gave it a whirl and this little guy came up.  It’s too bad I don’t have more brown markers though.  I had to make the bear such a dark brown.  Oh well, it’s a lovely excuse to go buy some more!  I think if I were to make this card again, I would put a second frame around the image.  The cardstock I chose matches the patterned paper SO well that it sort of disappears.

Here’s what I put inside my card.  You can replace “big brother” with “big sister” if needed, but the subject is meant to be a boy.
Baby has a boo boo
On his little head.
He needs lots of love
And snuggles before bed.
We must be very gentle
Because his boo boo hurts a lot.
Lucky that a loving,
Tender, family he’s got!
Big brother [NAME]
Must be gentle as he can.
Mommy will be careful.
She loves that little man!
Daddy will be calm
To soothe Baby’s cries.
With the whole family helping,
Baby will be a happy guy!

Tuesday, July 13, 2010

All Creatures Great and Small

Along with the warm weather has come the return of foliage to the trees and bushes beyond the fence of our back yard where the conservation area is.  We are happy to look out on to nature every day.  My parents-in-law, who rent our walkout basement, are thrilled to have a vegetable garden this year.

Since it goes with the latest thing in my Etsy shop, I decided to share some of the nature around our house.  Last year, owls, other birds and octopi were all the rage.  I’m not generally a huge fan of owls, although my mother’s favourite bird was the snowy owl.  I’m ready for a new animal now.  I’ve seen woodland creatures popping up in places: on papers, stamps and die cuts.  It’s been largely rabbits and fawns (a la “Bambi”.  I suppose that will be Disney’s next digitally re-mastered and re-released movie if it has not been done already.)


Deer have been spotted in our backyard too!  This little one is pictured right up at our fence gate.  Once it spied us spying it, it looked back to where mommy was watching.

One look back reveals she wasn’t very far away!   She was hiding in some higher brush.  You can still see some white spots on the fawn's coat!


I haven’t made a deer die cut, but I have made a little animal.  The animal I have to share with you today is a fox.

I showed my die-cuts to my sister and she said this one was really cute.  It is actually my baby dragon die cut, which I further altered to make this fox.

Well, I hope the deer don’t eat our vegetable garden!  I’m not much of a green thumb (well, not at all really!) but I have these purple plants that came from my mother’s house.  They love sunlight and don’t need much watering.  When we moved in to this house, someone else moved in to one of my plants on the porch too!

Wednesday, July 7, 2010

Studio Tour

Well, I cleaned my studio.  I had a personal craft day last weekend so I cleaned it for touring with my crafty friends.  It's very rare that the studio is this clean, although my definition of "clean" means "visible desk space" as there are always projects on-the-go that I don't want to stuff somehwere and then forget about.

I decided to show my studio because we're having some eletrical work done and one of the technicians said my craft room was so professional looking.  I was tickled.  He said he remembered it when they came to do the inspection first.  (I only semi-cleaned it then.)  For a man to mention it is out of the ordinary.  I think most would consider it a waste of space.


When one walks in to my studio and looks to the left, one sees my twin desks and triple windows.  While I have such beautiful natural light, it comes from the afternoon sun and heats my room up unbearably.  So, I rarely ever open the blinds.  (Air flow in this house is not the same as our last house.  It is very poor on the top floor while our last house was fairly equal on the main and upper floors.)  I can't have a fan - it would blow all my papers around!

The person before us used this room as a crafting room also.  Her hobby was painting.  My dad was an oil painter and my sister does well with water colours.  Me, I love paper more than colour.  No matter the art, there is always need for storage galore!  I have a space here for a second person to sit at the desk.  I sit on the far side, so I can see the door.  Most of the time, the second desk is littered with papers.  The plastic cart I have had for many many years.  It holds mostly ribbon in the first basket and brads, rhinestones and dew drops on top and a bunch of miscellaneous stuff.

Along the back wall of  my space is my Ikea Expedit shelf.  I purchased some boxes that go with it.  I have not yet assembled all the boxes, hence some of the cubby holes have been filled with "stuff".  The boxes do not fit 12 x 12 papers, but the shelf does.

Next to that is my computer station.  The twin stands here are actually microwave carts.  These were my desks before I bought the Ikea ones.  I find standing over my layouts gives me a better view.  As I make cards more and scrap less now, it was a better idea to go with a sit-down desk in this house.  The microwave carts are handy things: lots of storage and sufficient desk space.  There is a floating shelf above the computer (that didn't make it in to the picture).  In the corner of the room is my Boss Kut Gazelle.  It a plotter.  It plots the paths that I draw on the computer and cuts them out or draws them with a marker.  This is the machine that makes my die cuts.  If I was really pressed, I could move my paper cutter and a third person could craft in my room at one of the microwave carts.


My husband is supportive of my paper additction.  (Hey, I'm supportive of his gaming addiction!)  He took the door off my closet so I could get in there without obstacles.  My Walmart wire cubes were the predecessor storage shelves to my Michaels shelves in the next picture.  I have a wood plank across them and rest things in there like my manual die cutters.

These shelves are the latest additions to my studio space.  These are cubes from Michaels which I got on sale for my birthday present from my husband (in March) and which have been on sale since!  The small drawers are for my scraps by colour groups.  The big ones are for my full pieces of cardstocks and patterned papers.  I definately have more cardstock that patterned paper.  The open shelves are for my pieces of cardstock and patterned paper that have been cut but are too large for the small drawers.  The canvas bin on the floating shelf holds my stamping stuff.  The canvas bin itself came from the dollar store.  I love it.

This is where I take my pictures.  I open a couple blinds and turn on my Ott Lite daylight bulb (the black thing on the cabinets).  I get light from the windows and light from the Ott Lite on the opposite side.  It is very hard for me to take pictures in winter though.  I leave before the sun rises and come home long after the sun as fully set.  Not fun.  I can only take pictures on weekends then.

The Mimi rolling tote on the left was free!  I got it from Costco with my 5-year employee service award from the office.  I had been there more than 5 years at the time, but they were just re-instituting awards so I got a "catch up" recognition.  I had suggested just a card and a thank-you would be nice because some employees were over 15 years with the firm.  They decided to go the extra mile and give shopping rewards at Costco.  Everybody else opted for a gift certificate, but I got my rolling tote and my 12 inch Purple Cows trimmer.  While I have no complaints about this trimmer, I still want the Xacto laser trimmer.  There are a lot of times I am trimming something that printed crooked on my computer, so I can't use the paper edges as a guideline.  I have to eyeball how to cut straight along the printed edges.  The Xacto laser trimmer would show me where my cut is going with a laser light.  My sister has the Making Memories magnetic rotary trimmer but she says she likes my guillotine better.  I love the guillotine style trimmer and will never go back to rotary!  I never have a problem finding new homes for my old tools either.

I hope you enjoyed the tour of my paper studio.  If only I had a crafty friend to share it with, it would force me to keep the desk clear more often!

Sunday, July 4, 2010

Ship of Dreams

Firsty, HAPPY INDEPENDENCE DAY to all the Americans out there!


As I said I would, I have been trying to develop a boy's bookmark.  I didn't make the pirate flag (though I may still try that out), but I did make a ship.  I remember, when I was in grade school, we would have a read-a-thon every year.  We had to collect pledges for the number of books we read (or a flat amount if so chosen).  I used to get $0.05 per book.  I suppose they don't do the "per item" charge anymore because you have to disturb people twice: once to get a pledge and once to collect it.  I used to carry my little stack of books with me to show them how much I read and to tell them the story of the books if they asked me to prove I read them.  Door-to-door pledges of any kind are just not a good idea, in my opinion.  But the reading part was great!

I am very happy to be able to offer something that encourages reading!  So, here's my little boy's ship bookmark birthday card.  This one meets PaperPlay's challenge for Week 26, 2010 to make a card for a chile or teenager.

I love these stylized waves on the patterned paper from Kaiser Craft.  They remind me of comic book style art, which I envied when I was little.  I wanted to write comic books for a while when I was younger.  Really, comic books are soap-opera meets action-adventure with a fantasy twist.  Fabulous combination!

Back to reality though.  I also made this butterfly bookmark for the Etsy for Animals street team July team challenge: butterfly garden.  10% of the net proceeds from my butterfly bookmark card will go to the Southern Ontario Animal Rescue.

It's hard to see in this photo, but I both embossed AND glittered these butterflies.  There are 10 total butterflies: 5 on each bookmark shape.  The inner wings are embossed and the outer tips are glittered.  It took forever to glitter 10 butterflies.  I like my hot drink bookmark card better because there was only one, large shape to glitter.  This one is definitely a deluxe version!

I'm really enjoying this design!  I hope you are too!

Thursday, July 1, 2010

A Hot Drink and a Good Book


Before we get in to today’s craftiness, I wanted to wish all my fellow Canadians a
HAPPY CANADA DAY!
Here’s a little bit of flag knowledge for today.  I didn’t realize the flag, as I have always known it, was so young.  (Shame on me!)
Canadian Flag Info


Now, for the craftiness.  Only one thing came to mind when I saw Sketch 173 at Card Positioning Systems:


A BOOKMARK!

I have been trying to find a good way to attach a bookmark to a card for some time now.  There is a tutorial for a bookmark that is a perforated fold on a card, and then you tear the bookmark off but I’m not a fan of the perforated edge.  There is a tutorial for corner page bookmarks, which I may do in the future, but I wanted just a plain, traditional bookmark.

This sketch was my answer.


Now, I have seen tall, skinny card sketches before, but I was never drawn to them as cards.  Sure, they would make great money holders, but the narrowness just isn’t my flavour.  At least, it wasn’t until I saw this sketch and the light bulb when off in my head.  This sketch also meets the Magical Crafts fortnightly challenge: Flower Power!


I made my bookmarks in duplicate: the first one is removable and the second one is adhered to the card.  My favourite memories of my mother are having a cup of tea together and playing Scrabble, which was a past-time inherited from her father.  We didn’t play competitively, but just being around words and tea was stimulating and comforting at the same time.  That’s what inspired this bookmark.

So, my next task is to make a bookmark for children.  One of the things I am most grateful for in life is the encouragement towards continuous learning instilled in me by my grandfather Chen and my aunt and uncle Quon.  When I visited them as a little girl, they always emphasized how there is nothing I couldn’t do if I just take the time to learn how.  My aunt and uncle’s daughter, Caren, offered to be a pen pal for my sister and I when we were girls.  My sister is three years older than me and Caren is three years older than her.  Caren has a brother, but she has since told me how she enjoyed when my sister and I visited because it was like having sisters.  Having a pen pal encouraged us to read and write and, to this day, I think a solid ability to read and write is paramount to higher education.

So, I was looking through my die cut designs for something for children.  My nephew, David, enjoys pirates, so I was thinking along pirate lines.  Well, I didn’t quite make it.


I was looking at my skull die cuts.  (I happen to love Halloween.)  The skulls are perfect for sitting atop a bookmark.  Symmetry is fabulous!  So, instead of a children’s bookmark, I made a horror/thriller story bookmark.  The colour idea came from a one of my workshop attendants (whom I work with at the firm).  She had once suggested black and silver would look great.  Unfortunately, I didn’t have any silver paper at the time to give her some for her scrapbooks.  I have silver glitter though.  After having made the first bookmark card with the glittered cup, this one came naturally.


I will try again for a children’s bookmark.  I do really believe that children should be encouraged to read stories.  I did make a new robot die cut expressly for this purpose but I didn’t like how it turned out as a bookmark card.  Back to the drawing board!


I still think I can get this skull to work.  Maybe if I make it white on a black flag…

Anyway, before I finish I wanted to share a tip about working with glitter.  There are two ways to apply adhesive to die cut shapes: a xyron sticker maker and old fashioned tape and manually cutting it out on the tape.  My favourite is the tape because I am assured even adhesive coverage that way.  This tape isn't cheap though!  So, here's my tip: use your off cuts to adhere your project!  When you cut around your shape, you will have bits left.

Use this bits as regular adhesive.  It doesn't matter if they are oddly shaped.  They are going on the back of the project!  No one will see them anyway!


Here, my sandcastle pieces to be glittered are on the right.  My off cuts are placed back on to the tape backings for later use!