
I posted my dark lace long mailbox earlier, but it wasn't the first attempt at a mailbox. The first one, I wanted to be a full blown post box. I wanted to make it Christmas red and have a drawer type opening and a "locked" compartment in the back. The idea was was, children would drop their letter to Santa in and it would magically go to the North Pole over night.
As a play Post Box, I thought if I made an opening in the back, my nephews could pretend to be the mail man who has to "unlock" the box to take out the mail.
This is what the prototype looked like:

I always intended legs for it, but at this point I was focusing on that drawer drop box opening.

I used a wooden knob I got in a pack on sale at Michaels Craft Store and painted it black. I used a magnet closure and a metal washer. If I do this style again, I will place the drawer sides in a slit in the face of the post box so they don't flop around. Also, I will cut in to the face of the post box to make the top only a semi-circle so the door doesn't appear flat in a rounded top.

I like the back "locked" compartment. It's big and fun for children to pretend to get the mail.

After I finished building the basic box, I was exhausted for ideas. I didn't know what papers to use to embellish it and I realized I should have embellished the panels before assembling it. Oh well, that's what a prototype is for. (I may finish this one yet.)
I decided to simplify.

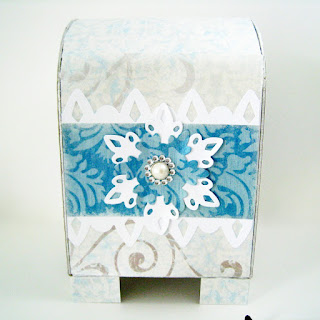
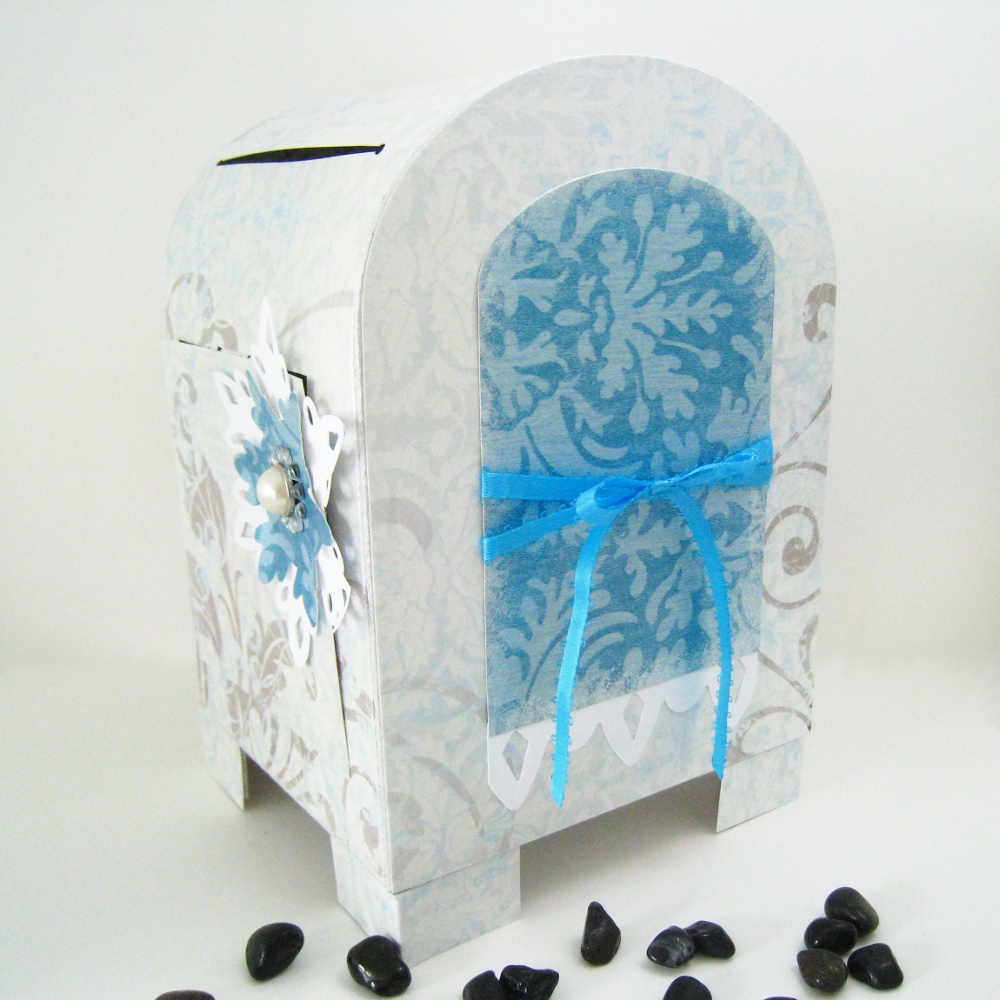
Taller and slimmer was the needed shape. No drop box opening, just a drop slot. The body cavity opening is in the front and uses a simple tuck-tag design.

I used patterned cardstock to build this one. That makes it pre-decorated. I just had to add some embellishments. (I did that before assembling this time!)


I used chipboard to make the sides and bottom. The cardstock is a thick DCWV Luxury Stack cardstock. I've had this paper for 5 years. Fantastic to use it up! I painted the edges of my chipboard with a Ranger pearl white paint dauber. I like the texture of the dauber tip and the pearl white matched the paper flawlessly. I also painted the edges of the darker blue cardstock (best visible in the close up of the embossed trees).
I submitted this to the Accucut Craft Grandemark challenge in the chipboard category, but I didn't win with any of my submissions. I still quite like it. I hope I find the time to make another before November. I want to give one to each of my sister and sister-in-law's household for their boys to write their letters to Santa. I know most kids email Santa these days AND get a response too (quite cool) but I like the tradition of a letter to Santa. Your own genuine wishes in your own genuine hand writing. The idea of seeing it progress year over year along with your fondest desires just tickles my fancy!
As a play Post Box, I thought if I made an opening in the back, my nephews could pretend to be the mail man who has to "unlock" the box to take out the mail.
This is what the prototype looked like:

I always intended legs for it, but at this point I was focusing on that drawer drop box opening.

I used a wooden knob I got in a pack on sale at Michaels Craft Store and painted it black. I used a magnet closure and a metal washer. If I do this style again, I will place the drawer sides in a slit in the face of the post box so they don't flop around. Also, I will cut in to the face of the post box to make the top only a semi-circle so the door doesn't appear flat in a rounded top.

I like the back "locked" compartment. It's big and fun for children to pretend to get the mail.

After I finished building the basic box, I was exhausted for ideas. I didn't know what papers to use to embellish it and I realized I should have embellished the panels before assembling it. Oh well, that's what a prototype is for. (I may finish this one yet.)
I decided to simplify.

Taller and slimmer was the needed shape. No drop box opening, just a drop slot. The body cavity opening is in the front and uses a simple tuck-tag design.

I used patterned cardstock to build this one. That makes it pre-decorated. I just had to add some embellishments. (I did that before assembling this time!)

A side with embossed trees.

The other side, below, just plain.
The back below.

I used chipboard to make the sides and bottom. The cardstock is a thick DCWV Luxury Stack cardstock. I've had this paper for 5 years. Fantastic to use it up! I painted the edges of my chipboard with a Ranger pearl white paint dauber. I like the texture of the dauber tip and the pearl white matched the paper flawlessly. I also painted the edges of the darker blue cardstock (best visible in the close up of the embossed trees).
I submitted this to the Accucut Craft Grandemark challenge in the chipboard category, but I didn't win with any of my submissions. I still quite like it. I hope I find the time to make another before November. I want to give one to each of my sister and sister-in-law's household for their boys to write their letters to Santa. I know most kids email Santa these days AND get a response too (quite cool) but I like the tradition of a letter to Santa. Your own genuine wishes in your own genuine hand writing. The idea of seeing it progress year over year along with your fondest desires just tickles my fancy!
OH My Goodness this is pure genius.
ReplyDeleteI love both of them.
I am shocked that you weren't chosen these are awesome.