Wednesday, December 7, 2011

Here comes the snow


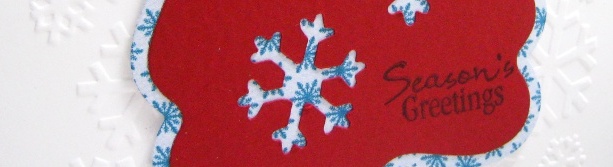
Here's a set of quick custom Holiday cards I made.  I had a set in my iCraft shop with cool tones: blue and aqua.  My customer requested red and blue.  I had trouble picturing ANYthing that would work.  Mix a warm tone and a cool tone for a winter card?  It just would not compute.

I got the message just before bed one night.  I laid awake thinking about it, trying to figure out how to combine them.  I spent the next day at work thinking about it off and on too and nothing was coming to me.  I was stressing a little bit.  I finally put it from my mind and decided I would have to wait until I was home and could see what kind of paper was in my stash.  (Then, I had to think if I even had enough red for the quantity of cards requested as I don't work with red much at all, actually!  I quickly squashed that thought too so I could do my work.)

After supper came the test.  What does the Fairy Cardmaker have in her tickle trunk (dating myself, but I really liked Mr. Dress Up as a child.)    I pulled two reds and started to play match maker.  I looked at my sample design my customer had pointed out and thought about layering.  I thought, well, I'll just make the red have a little wee border.  Then it will be mostly blue with a red highlight.  (I'm biased - my favourite colour is blue!)


Turned out differently.  Red is front and centre.  And I like it.  I am surprised: both that I was able to put blue and red together and that I like it.  Wonderful thing: my customer liked it too!  It just served to remind me that getting pushed out of your comfort zone can have surprisingly pleasing results!

I'm still behind in my cards though - I have a large custom order with a delivery schedule.  I am only 1/4 of the way through the first delivery.  Plus I have a personal 65th birthday that needs a card super fast.  I have an idea for that one, so I'm off to it!

Tuesday, November 29, 2011

Custom Frenzy

Challenge is good.  I've been a little ambivalent about some changes happening at work.  Half of my job is going to be removed from me over the next five years - the half that I fought for and wrote the job description for.  I'm going to regress back to what I was doing before.  I'm also going to have to re-prove my skills for my old function now that I'm returning to it full-time.  On the other hand, the opportunities and the ceiling for me at work just sky-rocketted a whole lot higher.

So, while I see the next 5 years are a setback for me, it's a temporary set back.  It has made me realize that, new growth is found through challenge.  I fear change.  I accept that life is about change - from year to year, from day to day, from moment to moment even.  I face it, but I'm allowed to still fear it.  So long as I face it.  If you don't, you go the way of the dinosaur.


Which brings me to my first custom order: a die cut dinosaur.

So, I've gotten a frenzy of custom orders this month.  It's a challenge for sure.  These orders make me smile and fret at the same time.  The day job comes first and it has its own host of challenges right now (and for the next foreseeable five years).  With that going on, will I be able to get enough supplies in for these custom orders?  Will I meet the deadlines?  Will I even be able to create what is desired?

Well, I had to say no to a couple designs.  I knew I didn't have the talent to make them.  If I can't draw it, I can't break it down to basic shapes and, therefore, can't reproduce it on my computer.  Lucky for me, the customer gave me choices.  As soon as I saw the choices - one stood out.  An image immediately came to my mind and I sketched it down:


At first, I planned to cut the dinosaur body separate from the spikes because the body is one colour and the spikes are another. Then, I realized I could cut the dinosaur FULL in silhouette - body, spikes and all.  I could then cut the body without the spikes and just layer it on top of the full silhouette.  The spikes will stick out and be placed perfectly every time.  I won't have to place each spike by hand.  (Nor will I have to place that itty bitty eyeball.  It can be the same colour as the spikes if I just cut it as a window through the body layer.)

Here's what it looks like on my computer screen.


And here is is all finished as a Christmas ornament.  The names are too small to make with die cut letters.  I put a gel pen in my machine and drew them.  Then I just coloured them in.


I like that this ornament doesn't have to be an ornament.  It can be a door hanger!  One day, I will have time to make some plain ones, but not until my other custom orders are happily on their way.  I'll tell you about the others later!

Sunday, November 20, 2011

It's a keeper!

I made my first match box treasure box a little while back.  I've been meaning to make more ever since and have also been thinking about artist collaboration but I have only brainstormed and not much more than that.  Yes, it takes me a LOOOOONG time to execute an idea.  But, as I said, I've been wanting to make room for a new machine and that means cranking out old project ideas.

This is my baby boy keepsake box.  I upgraded the box pulls from my awkward button knobs on my first box to ribbon pulls.  I think this is much better!


I found a little poem on a quote site and used it for the outside of the box.  I completed it to suit my box with the inside poem.

(Click to Enlarge)


I'm happy with how it turned out.  My brainstorming is leading me towards smaller themed boxes.  At my pace, I'm sure I'll get to it in a year or two!

Monday, November 14, 2011

Little Quilled Angels

I snagged a big table for my paper studio from my favourite local scrapbook store's closing sale.  I bought it to hold the big honkin' machine I've been drooling over for nearly a year.  However, to make room for it, I had to move one of my microwave carts out.  Until I can buy the wall unit I want, I can't abandon the cart, so it's in the hallway.

Plus, my new table is just littered with unfinished projects.  I tried to tell myself that if I finished these projects, then I could buy my machine.  No toys if I don't sit myself down to use them!

Some of my unfinished bits are these quilling strips I cut from cardstock.  I think I'm going to try real quilling strips on my next round of goods to buy.  However, I had cut these for a class, so they were all the right size to make little paper quilled angels.

When I was pulling out some Christmas paper to donate to Creating for a Cure (which I talked about a couple weeks ago), I realized just how much Holiday paper I have.  Put two and two together, and I have some more paper quilled angels!


I love the colours in this paper combo (from Die Cuts with a View). It reminds me of snowflakes on a calm day.  When the wind is still, that is when winter is beautiful.


It's a small start, but it's a start!