Showing posts with label cards. Show all posts

Tuesday, October 15, 2024

House Shaped Easel Card - Happy Diwali

I saw this house shaped card video by Jennifer McGuire and remembered I have a Top Dog Die (now out of business) that is a house shape. It's 5 x 7 so I knew I could make a shaped card out of it. So, I shopped my stash! I knew I had a lot of smaller dies I could use with this house but I did keep it pretty simple.

Easel cards is the theme of my next card making class. I did a slimline card class in October as my first class in 2 years. The kit was a repeat for those who didn't make it to my class in October 2019, but I did change up one of the card to use a new stamp set. But - that's a story for another day!

When I made the sample for my easel card class, I realized the string of lights could be perfect for Diwali! Lights play an important role in this holiday for several religions. I have a co-worker who celebrates both Diwali and Christmas. So, I made this card for her.

I have an alphabet set of "Lego-like" peg stamps that click together, so I knew I could spell out Diwali. For my Christmas versions of the house cards, I spelled out "holidays" to go with the "Happy". I also have a giant "Noel" stamp, so I cut that from the red satin finish cardstock and then spelled "Joyeux" to go with it so I have a French language option too! The size of the big word stamps fill the rooftops of these houses perfectly, or else they would have looked like a big void.


While my holiday houses have more greenery, I opted for more light strings for the Diwali version. I cut them from white cardstock and coloured them with copics and glitter pens. The bulbs are all glittery. I also used my lamp post die. I rarely get to use it, even though I love the lantern-style of the lamp posts. Behind these ones, I put some alcohol inked paper that I did over pearl card I made. So, it's a shiny alcohol ink blend of yellows and oranges.


I love how easel cards display themselves. This way, you can see the warm sentiment inside and enjoy the outside of the card at the same time!

There are A LOT of windows on this card, each with 3 steps: The window frame, some vellum, some blue cardstock. The vellum is very subtle but it does help give that window pane glass look.

I have lots of dies that can make shaped cards. I just never have the inspiration to get up and do it! But this time I did! I will try to remember to share my holiday versions later in the year!

Sunday, June 2, 2024

Heat Embossing Techniques on Handmade Cards

 Hello crafty world! My creative crew wanted to practice some heat embossing techniques, so I've made some kits for 4 cards. These cards include:

  • A regular, heat embossed sentiment
  • A coloured, stamped sentiment overlaid with clear heat embossing
  • Emboss Resist
  • Watercolour emboss resist and lift
  • A DIY embossing powder enamel shape
  • Water splatter embossing
  • Water coloured focal images with each image heat embossed on watercolour paper 
  • Watermark stamping
My favourite is the water splatter embossing. The bear from Penny Black stamps is just so amazing. Penny Black makes great stamps for colouring because the spaces are big. I think that if you swap out the sentiment on this card, it could make a great sympathy card too.

The teddy bears from Penny Black are just adorable, including this tea cup one. This card features the emboss resist lift. First you colour the background, then you clear emboss on it, then you mist it with water and sop up some of the exposed colour. 

 
This one is the watermark - no embossing powder.


And this one is the same background stamp but as emboss resist. I clear embossed on plain white cardstock and then inkblended over top after. I put the house die cut in my mini pancake maker and melted gold embossing powder on it. Then I sprinkled on some white embossing powder and swirled it with a toothpick.


 Which one is your favourite card? Which technique is your favourite heat embossing technique?

Friday, February 16, 2024

DIY Mini Envelope

 I've been having fun using up paper scraps to make mini-envelopes as embellishments for my cards. I figured out how to make the medium sized one with the Envelope Punch Board. But I also wanted some mini ones so I figured how to do that on the Scor Pal score board, with out the Scor Envi guide.


Tah-dah! This size of DIY envelope is a bit smaller than the currently popular Envelope of Wonder die by Spellbinders. I did make one the same size as the Envelope of Wonder, but I find it a little big. I made this as my mother-in-law's birthday card. I used a few Penny Black stamps and went for a watercolour look. I watercoloured the bird and then the flowers are a solid stamp, designed to look like you watercoloured them. The newsprint paper is among the last of the scraps I have for it. I love that paper!

I think I did okay with the watercolour. It's not my style but I've tried a few more since then. I do love that you only need 1 colour to get the variations by diluting with water. But, you don't get the same degree of control that you do with alcohol markers. It was fun to play around with something different though!

Do you like making mini-envelopes? What do you use yours for?

Saturday, December 2, 2023

Scrap Paper Christmas Cards

If you're a paper crafter, you have scraps! I've been working away at my Christmas paper stash for a few years. I finally finished one pad off and another is about halfway there. I'm not going to buy pads again unless I love a lot of it or I'm making a mini album and I will use most of it for that singular project. I'm finally "low" on Christmas paper, but I picked up more from others who were offloading them, so it's still on the no-buy list unless I'm making an album.

So, this year, I've been saving up these scrappy card ideas and I made some Christmas and winter cards! I think they turned out great!


I started with the envelopes. Spellbinders has an "Envelope of Wonder" die set that is popular right now. But I knew I could make mini-envelopes on my own with my score board. I also knew I had tonnes of little shapes and stamps that I could stuff the envelope with. So, this is my take on it!


The first one is stuffed all with die cuts and a branch punch. For the second one, I cut out the snowman and ornaments from a paper pad. The trees, greenery, bird, and garlands are other die cuts I have. I used an embossing folder in the background for interest. The greeting is a hot foil stamp. I hot foiled it on the left and letterpressed it with pigment ink on the right. I don't have the matching die, so I cut it out by hand.

I had so much fun making envelopes in different sizes. The one above and the tiny mini envelopes were my favourites. The larger envelope uses a 4.5 inch square and the smaller one uses a 2.5 inch square. These use a decent amount of scraps! For the mini's, I coloured up a whole stamp set with my Copic markers and stuffed them inside the envelopes.

The next thing I tried were strip clusters. I had some left over strips and I've seen lots of YouTube videos for making your own cluster embellishments. Clusters are not my strong suit. I lean to clean and simple. I started with just layering up the strips. I made some paper stockings and these were the left overs. When I sat down to make cards, I pulled out the layered strips (pictured on the right). Then I just tried to match them with a focal image and a sentiment.

Although I tried to add some interest with the softly ink blended circle frame, this card still felt a bit too plain for me. It's fine for a masculine card, but it needed something more. So, for the next one, I embossed the background again and it made a big difference!

Then I did one more step with the embossing folders and used white pigment ink on top.

The last of the scrappy Christmas cards I made use the tried and true scrap strip background technique. You just keep layering strips next to each other to cover some amount of the background. Then I used an idea from Jill Foster (from the Penny Black YouTube channel). Penny Black has some sentiment dies that cut out only the top part of the word. So, I did some partial die cutting to mimic the effect. Their dies do a swooshy line. I could only achieve a straight line but I think it looks fine.

The "joyful" die by Hero Arts has a shadow. The shadow is what I partially die cut and then I cut the word from red foil cardstock. For the next batch, I don't have a shadow die. So, I just manually cut around the words. It's easier with words like these (from C.C. Rubber Stamps) that are not too frilly.

I finished all the cards off with some enamel dots - except the deer. It has flat stickers (I think they are vinyl). The "candy" style dots are from Queen and Co. and were actually marketed as beach balls. But I think they look like candies. The glitter dots are from my Your Next Stamp stash. (Your Next Stamp is closed now, sadly.)

I hope these scrap paper Christmas cards inspire you to work your stash this holiday season! I really like the bear on the strip cluster and the partial cut words on the strip backgrounds. What's your favourite?


Tuesday, May 9, 2023

Playing with Ink Blending on Handmade Cards

 Hello world! It's been a while since I posted any creations. Rest assured, I have been crafting but at a much reduced level for the last while. I have been experimenting with some new tools and techniques of late though, so I wanted to share some of that.

Today, I'm sharing some ink blending. The first up is a no-risk ink blended panel. There's no risk to this one because the panel is a separate piece. If it doesn't turn out the way you want it to, then you simply start over - no card ruined!


I used a purple and a pink about half'n'half. Then I used a blue at the top to blend over the lighter pink to create a bit of a purple hue to the blue. I used dye-based inks for this one. For this panel, I blended on Copic Xpress It paper because it's the smoothest card I have. The card background is embossed with a chevron patterned embossing folder. Since that adds texture, I thought simple, plain, smooth white cardstock die cuts would be just fine.

Don't have die cuts? No problem. On this version, I literally scribbled a tree line and some trees. Absolutely no skill required!


It's simple but effective, if you ask me!

On the next card, I did a traditionally blue sky. It was inspired by Michelle Short of the Card Grotto. See her card here: MFT Stenciling. Her cards are always a clean and sharp design that I really like.

This one was done with Distress Oxide inks directly onto the card front. I masked off the edges and used my homemade cloud stencil for the bottom edge.


I tried to make it cheerful and masculine but rainbow is just not my style. I find, every time I try something rainbow, I end up not liking it. I work better in monochrome, I guess. So, I did another with a stamped image as the focal.


I like this one better, but I feel like the border was a little bit too wide. Still turned out cute though! How could it not with the ever super cute stamp set from Lawn Fawn? (Really High Five stamp set.)

Lastly, I tried spotlight ink blending. I used the same stamp for the first attempt:

 This was also with Distress Oxide ink and a blending sponge. You can see marks - it's not that smooth. So, I tried again with a dye in and a blending brush instead and I like this result MUCH better. It's directly inspired by a card made by Gina K. Designs in this video: See snowman spotlight ink blended video.

Do you like to ink blend? What style is your favourite?


Saturday, April 2, 2022

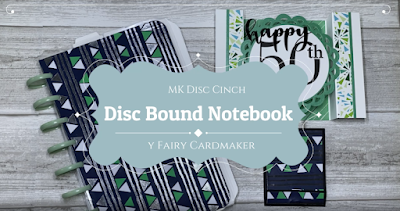
Discbound Notebook with the WRMK Mini Disc Cinch

I recently purchased the We R Memory Keepers Mini Disc Cinch. After playing around with it making a couple of prototypes, I made this disc bound notebook for a friend. I had seen others make DIY planners using Dollar Tree gift bags as covers, so I tried the same thing.

This is a gift set of goodies including the notebook, a bridge card, and a matchbook notepad. I also made tab dividers for the notebook with my WRMK envelope punch board and some coffee cup shaped paper clips.

You can watch my video walkthrough of this project and some thoughts on the Disc Cinch on my YouTube channel. Just click the picture!


Sunday, March 27, 2022

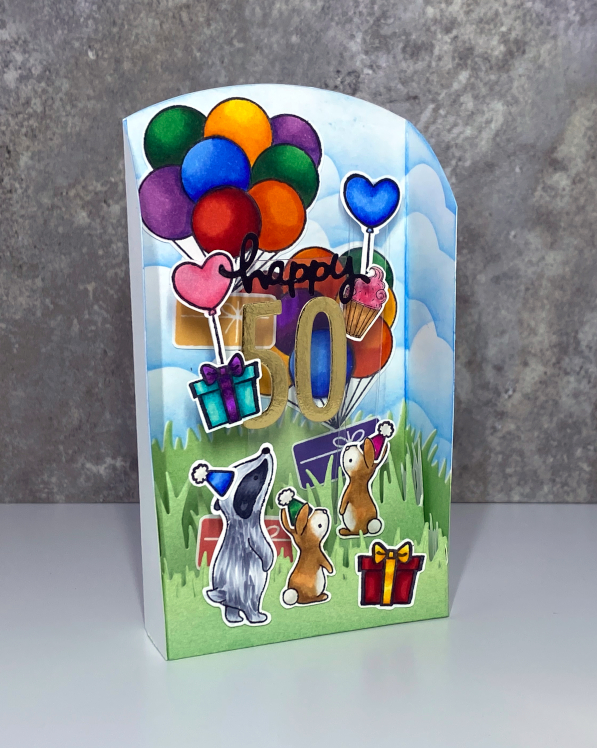
Shadowbox 50th Birthday Card

One of our friends turned 50 this month, so I wanted to make him a special card. This is a true milestone for him and needed to be celebrated! I used the same template I made for my mother-in-law's birthday card (here: alcohol inked shadowbox birthday card). For that card, I inked up the whole sky with an alcohol ink technique.

For this one, I did regular ink blending with blending brushes.


Everything on this card started out as white cardstock. I used a grass mask by Lawn Fawn to make the grass line in the back. I used my homemade cloud stencil for the sky. The grass in the middle layer is a long grass die cut that I ink blended and the front layer is a short grass die cut that I also ink blended. 


Then I stamped the critters and coloured them with my alcohol ink markers and cut them out by hand. I dug into my stash to make this card! There's a whole medley of stamp sets! (It actually took quite a long time to make this card.) All the critters are from a Hello Bluebird stamp set. I found two gift stamps: a solid one and one I had to colour in. I used a Your Next Stamp balloon cluster image and I found a single balloon in another stamp set. I forget what stamp set the party hats are from, but boy they were REALLY TINY to colour in!


I knew I wanted a large 50 to be floating in the middle. I used acetate for that. Since cleaning my craft room, I put all my "leftover" bits (e.g. die cut but not used, stamped but not used, etc.) in what I'm calling my "bits box". So I dug in there and found the cupcake. I coloured that up and put it in!

I put a pocket on the back and wrote out a little poem for a sentiment on a separate sheet that I slipped into the pocket. I like how it turned out and our friend liked it too! I think it turned out fine for guys or gals, so I'm very happy with it!


Friday, December 31, 2021

Handmade Holiday Cards Received for 2021

 I thought I would show off the handmade cards I received for Christmas 2021 as my last post in the year. I love getting cards from my Creative Crew. I get to see their learning in action!

The first to arrive was Debbie's card. It's super glittery with a patterned glitter paper as the background. I cut tiny cardinals for Debbie. She just loves them. So, she made me a cardinal card!


The sentiment was left from the last card class we had together. The cardinal has glitter accents and the poinsettia is made from foiled paper. On the inside, she stamped an evergreen, put a golden start sequin at the top and put one of the tiny die cut cardinals inside.

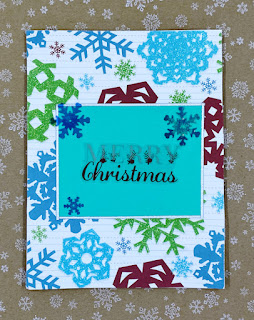
The next card was from Norma. I seem to have a weakness for snowflakes so she made me a card full of them! Plus they have glitter accented ones in the paper too. Teal (leaning to blue) is my favourite colour, so this card speaks to me (and has only nice things to say)!


I got a lovely snowman card from Claire. Our last card class was an easel card class. So, she made a easel card to showcase what she learned! She stamped a happy snow-family and coloured it with alcohol markers.


You can see how the easel card stands in this image:

She put a die-cut greeting on the inside and her heartfelt message on the back of the card. I have the same die-cut greeting. I just love die-cut greetings. I think they stand out so well. You can also see in the second image how Claire added just a touch of sparkle to the snow with a glitter pen. All the falling snow is coloured in and there's some on the ground too.

The last handmade card I got was from Maria. Maria lives farther away so she doesn't get to come to the crafty classes, but she attends some near her with a local Stampin' Up! demonstrator. The colours are just gorgeous. It looks like she die cut some evergreens from some ink-smooshed papers. 

She arranged them on an embossed panel of trees. You can see the embossing better in the second photo. Her sentiment has been placed behind some vellum for a soft look and popped up on foam tape for dimension.

It's a very soft and serene card - also clean and simple looking, which is totally up my alley!

I am happy to have so many creative people around me. How about you? Did you get any handmade goodness this holiday?

Sunday, December 26, 2021

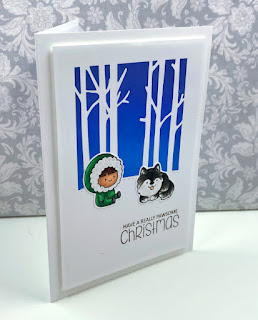
Husky Christmas Card

 Our doggy had a big budget this year! I made a card for my husband to go with the gift our doggy bought him. The gift had to do with walking together in the winter, so I made a nice little winter scene.


Now, I don't ink blend often, but I do admire it! So, I decided to try it out. I bought this Clearly Besotted Holiday Huskies stamp set last year but didn't end up using it. I based my card off of a sample in another Clearly Besotted stamp set called Prancing Plushies. (Click the link to see their samples. Their plushie sets are adorable!)

I started out by cutting my tree masks. I used Avery Repositionable Labels from Staples (Business Depot). I bought a pack of it as 8.5 x 11 full sheets. This stuff is great! I used birch tree dies from Joy Crafts and a stitched hill from Creative Expressions.

Then I used mint tape from Scrapbook.com to mask a half-inch border on my card front. (Mint tape is like Post-It tape.) I used my glass mat grid lines and a ruler to help me get it straight. When the masking was done, it looked like this:

I used 3 colours of Distress Oxides to blend the sky (Salty Ocean, Blueprint Sketch, Chipped Sapphire). I bought these three colours years ago specifically for sky blending. This might be the 3rd time I've used them. (As I said, I'm not big on blending!) I used my make-up brush tool to blend. It look a long time to get a solid blend. In retrospect, I wish I had tried a foam dauber. It would put down ink faster, I think.

Here's what it looked like when the blending was done:


And then.... the big reveal!

From the Holiday Huskies stamp set, I chose two images and coloured them with my Copic Markers.

I had to colour the husky to look like our dog, Shadow! I cut out the images with scissors and then added a sentiment from the same stamp set to finish off the card.

Hubby liked it!


Do you make cards from your pets?


Thursday, December 23, 2021

Shadow Box Birthday Card - Alcohol Inked Background

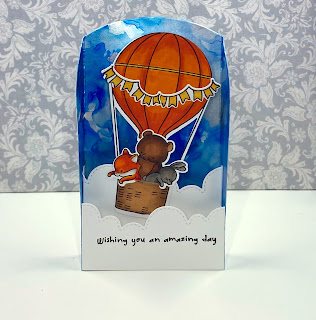
I made my MIL a birthday card this year using a brand new stamp and die set I acquired from Hello Bluebird. I love their storybook line art. I don't normally go for the dies, but I did for this one because the hot air balloon does cut out inside the strings. I have been looking for a good hot air balloon die forever! I think a hot air balloon is perfect for both feminine and masculine cards.

I modeled the shape of this card from a video by Jennifer McGuire (here: 3D Display Cards - Many Sizes!). I made some templates for different sizes of these arch-topped shadowbox cards using a few of my arched Accucut Craft dies. I show the die used for this one in my video (linked below). However, you could use a plate to round the top of your shadowbox.

I coloured my images with Copic markers. Not thrilled with how the balloon turned out. I need to look up how to colour that rounded shape. Not only is the whole balloon rounded but also each of the panels has a curve.

Besides the stamp set, the main feature on this card is the background sky. I made it myself with my alcohol inks. I recorded the process in a video posted here:

Alcohol Ink Background Sky


I share a tip on how I get the look of alcohol pearl inks without having any pearl inks! I hope you try out some alcohol inky backgrounds yourself. Come share in the comments if you do.

Sunday, August 22, 2021

Frameless Shaker Card

I am so happy that there are so many people on YouTube who share what they learn! I had seen this idea to make "shaker pockets" a long time ago, but it fell from my mind. Lately, however, Amy R., from Prairie Paper & Ink, has been making these borderless shaker cards and finally inspired me to try one.

So, I made a retirement card with it. I used one of my newest stamps from Lawn Fawn called Really High Five. I coloured it with my Copic markers. The bear shape reminds of me of gummy bears, so I made him a fun, non-traditional colour! Behind the die cut (which is by Creative Expression), I used my homemade cloud stencil for a colourful, puffy sky.

I wrote a poem for the inside. My friend loved it! She wants to learn how to make the frameless shaker card! (So, I sent her a video by Amy R.)

It's faster than traditional shaker cards that use a foam backing but, sometimes, that dimension is nice. I do have a few shaker die sets from Queen & Co. now that I need to try out. Their foam is SUPER thick, so I may cut my own foam. We'll see!

Do you like shaker cards? Have you tried the frameless kind?

Monday, March 8, 2021

Reusable Handmade Greeting Cards

 In today's economic climate, we need to make every penny count. This is the time we want to reach out to others more than ever, since we cannot always be face-to-face. Sending a handmade card is a great way to make someone feel unique and special. But, sometimes, the best cards are a bit costly.

Enter, the reusable handmade greeting card. This trend is catching on. Stamp companies even make stamps that indicate to the recipient that the sentiment insert is removable so that the card can be sent again. (But... why buy a stamp when a post-it note will do?)

I have a die that cuts out photo corners. I figured it's a great way to use scraps AND make my cards reusable! For these three cards, I put 3 stacked inserts on the inside.


Here's an image with the Birthday Card's sentiments pulled out so you can see them.


This way, the recipient can keep your heartfelt note and send the lovingly handmade card on to brighten another person's day! (If you have a lot to write, you can also use the back of the insert too.) I made sure the image on the inside is a light enough ink that you can write over top of it.

What do you think of this trend? Will you try it? Triple the joy!

Sunday, November 22, 2020

Got Large Image Stamps? ...

 ... Make bridge cards!! Continuing my experiments with bridge cards, I figured they would be a fantastic way to employ the large image stamps I've struggled to use in the past. You know, the ones that take up an entire A2 card front. Of course, I could make 5 x 7 inch cards, but it's a pain to make envelopes for them because an 8.5 x 11 inch sheet of paper is a smidge too small for my large envelope die.

Enter, the bridge card.

I have some stamps from High Hopes Rubber Stamps. I've had them a long time. I bought them because I believed larger images would be much easier to colour. I failed to account for the fact that large images would be harder to incorporate on a regular sized card.

Well, they are perfect for bridge cards! The image spans the gap in the front to create a free-standing card with dimension!

I really like how this one turned out. I coloured these cards with my Copic Marker alcohol markers. These cards are also a fantastic way to use up scraps! The paper in the centre is a scrap as well as the two, half-inch strips along the sides! Plus, it still folds flat to put in the envelope.

I really enjoyed colouring this Santa with the kittens.

The only thing about the vertical bridge cards is that it leaves only a tall skinny space to write on the back. So, I figured out the dimensions for a landscape version. I coloured another image from High Hopes Rubber Stamps for this card.

The sentiment on this card is from a stamp set by Dreamerland Crafts. Both High Hopes and Dreamerland are small Canadian businesses. I know huge sentiments are all-the-rage right now, but if you are using a huge image stamp, a small sentiment is just what you need - and we all probably have heaps and heaps of those!

Boy, it took me a long time to colour this one just-so, that's for sure! I used a stitched hill to bridge this card, even though Santa and the reindeer would have been wide enough on their own. I had thought about doing a roof top with layered scallops. I might try that next time. For this Santa, I added some sparkle on his coat trimmings and hat with Nuvo glitter drops. (Stickles would work just as well.)

So, bust out your BIG stamps and dig into your scraps. Have a ball creating bridge cards for all occasions!