Friday, December 31, 2021

Handmade Holiday Cards Received for 2021

 I thought I would show off the handmade cards I received for Christmas 2021 as my last post in the year. I love getting cards from my Creative Crew. I get to see their learning in action!

The first to arrive was Debbie's card. It's super glittery with a patterned glitter paper as the background. I cut tiny cardinals for Debbie. She just loves them. So, she made me a cardinal card!


The sentiment was left from the last card class we had together. The cardinal has glitter accents and the poinsettia is made from foiled paper. On the inside, she stamped an evergreen, put a golden start sequin at the top and put one of the tiny die cut cardinals inside.

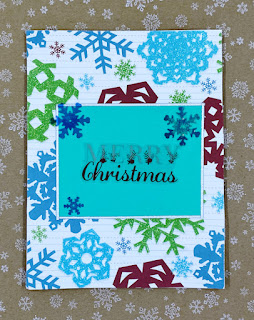
The next card was from Norma. I seem to have a weakness for snowflakes so she made me a card full of them! Plus they have glitter accented ones in the paper too. Teal (leaning to blue) is my favourite colour, so this card speaks to me (and has only nice things to say)!


I got a lovely snowman card from Claire. Our last card class was an easel card class. So, she made a easel card to showcase what she learned! She stamped a happy snow-family and coloured it with alcohol markers.


You can see how the easel card stands in this image:

She put a die-cut greeting on the inside and her heartfelt message on the back of the card. I have the same die-cut greeting. I just love die-cut greetings. I think they stand out so well. You can also see in the second image how Claire added just a touch of sparkle to the snow with a glitter pen. All the falling snow is coloured in and there's some on the ground too.

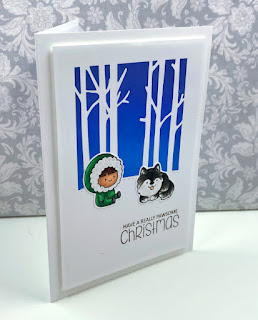
The last handmade card I got was from Maria. Maria lives farther away so she doesn't get to come to the crafty classes, but she attends some near her with a local Stampin' Up! demonstrator. The colours are just gorgeous. It looks like she die cut some evergreens from some ink-smooshed papers. 

She arranged them on an embossed panel of trees. You can see the embossing better in the second photo. Her sentiment has been placed behind some vellum for a soft look and popped up on foam tape for dimension.

It's a very soft and serene card - also clean and simple looking, which is totally up my alley!

I am happy to have so many creative people around me. How about you? Did you get any handmade goodness this holiday?

Sunday, December 26, 2021

Husky Christmas Card

 Our doggy had a big budget this year! I made a card for my husband to go with the gift our doggy bought him. The gift had to do with walking together in the winter, so I made a nice little winter scene.


Now, I don't ink blend often, but I do admire it! So, I decided to try it out. I bought this Clearly Besotted Holiday Huskies stamp set last year but didn't end up using it. I based my card off of a sample in another Clearly Besotted stamp set called Prancing Plushies. (Click the link to see their samples. Their plushie sets are adorable!)

I started out by cutting my tree masks. I used Avery Repositionable Labels from Staples (Business Depot). I bought a pack of it as 8.5 x 11 full sheets. This stuff is great! I used birch tree dies from Joy Crafts and a stitched hill from Creative Expressions.

Then I used mint tape from Scrapbook.com to mask a half-inch border on my card front. (Mint tape is like Post-It tape.) I used my glass mat grid lines and a ruler to help me get it straight. When the masking was done, it looked like this:

I used 3 colours of Distress Oxides to blend the sky (Salty Ocean, Blueprint Sketch, Chipped Sapphire). I bought these three colours years ago specifically for sky blending. This might be the 3rd time I've used them. (As I said, I'm not big on blending!) I used my make-up brush tool to blend. It look a long time to get a solid blend. In retrospect, I wish I had tried a foam dauber. It would put down ink faster, I think.

Here's what it looked like when the blending was done:


And then.... the big reveal!

From the Holiday Huskies stamp set, I chose two images and coloured them with my Copic Markers.

I had to colour the husky to look like our dog, Shadow! I cut out the images with scissors and then added a sentiment from the same stamp set to finish off the card.

Hubby liked it!


Do you make cards from your pets?


Thursday, December 23, 2021

Shadow Box Birthday Card - Alcohol Inked Background

I made my MIL a birthday card this year using a brand new stamp and die set I acquired from Hello Bluebird. I love their storybook line art. I don't normally go for the dies, but I did for this one because the hot air balloon does cut out inside the strings. I have been looking for a good hot air balloon die forever! I think a hot air balloon is perfect for both feminine and masculine cards.

I modeled the shape of this card from a video by Jennifer McGuire (here: 3D Display Cards - Many Sizes!). I made some templates for different sizes of these arch-topped shadowbox cards using a few of my arched Accucut Craft dies. I show the die used for this one in my video (linked below). However, you could use a plate to round the top of your shadowbox.

I coloured my images with Copic markers. Not thrilled with how the balloon turned out. I need to look up how to colour that rounded shape. Not only is the whole balloon rounded but also each of the panels has a curve.

Besides the stamp set, the main feature on this card is the background sky. I made it myself with my alcohol inks. I recorded the process in a video posted here:

Alcohol Ink Background Sky


I share a tip on how I get the look of alcohol pearl inks without having any pearl inks! I hope you try out some alcohol inky backgrounds yourself. Come share in the comments if you do.

Sunday, August 22, 2021

Frameless Shaker Card

I am so happy that there are so many people on YouTube who share what they learn! I had seen this idea to make "shaker pockets" a long time ago, but it fell from my mind. Lately, however, Amy R., from Prairie Paper & Ink, has been making these borderless shaker cards and finally inspired me to try one.

So, I made a retirement card with it. I used one of my newest stamps from Lawn Fawn called Really High Five. I coloured it with my Copic markers. The bear shape reminds of me of gummy bears, so I made him a fun, non-traditional colour! Behind the die cut (which is by Creative Expression), I used my homemade cloud stencil for a colourful, puffy sky.

I wrote a poem for the inside. My friend loved it! She wants to learn how to make the frameless shaker card! (So, I sent her a video by Amy R.)

It's faster than traditional shaker cards that use a foam backing but, sometimes, that dimension is nice. I do have a few shaker die sets from Queen & Co. now that I need to try out. Their foam is SUPER thick, so I may cut my own foam. We'll see!

Do you like shaker cards? Have you tried the frameless kind?

Monday, March 8, 2021

Reusable Handmade Greeting Cards

 In today's economic climate, we need to make every penny count. This is the time we want to reach out to others more than ever, since we cannot always be face-to-face. Sending a handmade card is a great way to make someone feel unique and special. But, sometimes, the best cards are a bit costly.

Enter, the reusable handmade greeting card. This trend is catching on. Stamp companies even make stamps that indicate to the recipient that the sentiment insert is removable so that the card can be sent again. (But... why buy a stamp when a post-it note will do?)

I have a die that cuts out photo corners. I figured it's a great way to use scraps AND make my cards reusable! For these three cards, I put 3 stacked inserts on the inside.


Here's an image with the Birthday Card's sentiments pulled out so you can see them.


This way, the recipient can keep your heartfelt note and send the lovingly handmade card on to brighten another person's day! (If you have a lot to write, you can also use the back of the insert too.) I made sure the image on the inside is a light enough ink that you can write over top of it.

What do you think of this trend? Will you try it? Triple the joy!