I was inspired by the talented and clever Jennifer McGuire to try my hand at some bridge cards. [Click to see her bridge cards.] I don't like tent fold cards because they flatten out when you try to display them. Therefore, I rarely make cards in landscape orientation. These bridge cards create a way for cards to stand freely, no matter the orientation!
I worked out dimensions different from Jennifer's so that I could maximize the writing space on the backs. I started with some portrait orientation slimline (or tall skinny) cards. The door wasn't quite wide enough to span the gap, so I put a banner behind it. The one with the row of houses was definitely much easier. I really like how Santa and his reindeer turned out. They are from the North Pole Littles stamp set by Hello Bluebird who have such sweet storybook style images. I mounted them on acetate and then strung paper twine between them to be the reigns. (And, of course, there is glitter on Santa's hat!)


These are how the landscape versions of A2 (4.25 x 5.5 inch) cards turned out.
I used a heat embossed Christmas tree stamp and coordinating die, plus a die cut sentiment to span the gap. On the silver tree, I used multi-colour homemade enamel dots as the ornaments (or baubles).
Then I tried it in portrait orientation. This tree has white blizzard Nuvo drops as the baubles. I die cut the sentiment three times from thick cardstock, layered it up and then die cut it from silver glitter cardstock for the top most layer.
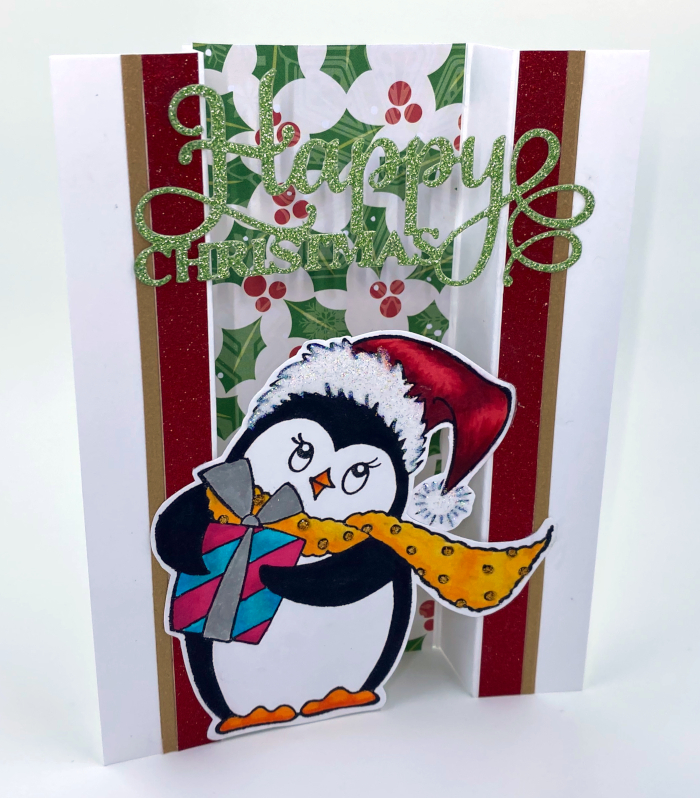
I finally have a way to use some of my GIANT stamps! They can span the gap on these cards! This penguin is sweet, but so big. My sister has a similarly big snowman stamp. So great to find ways to use what we've got!
These bridge cards are truly economical on patterned paper. What a fantastic way to use up scrap strips in the centre panel! The downside to it, thought, is that the portrait versions have such a narrow space on the back to write. There really isn't a lot of room. I could put a tent-fold flap back there to create more room, but I decided to work out the dimensions for "open front" shadow box cards (as opposed to
diorama-style cards with a framed window, like I made before). These achieve the same dimensional effect but offer more writing room on the back than the bridge cards. This one isn't quite the one I was aiming for. I will try some more where the "front bench" is really a scene that spans the gap. But this was the one I made to test the sizing.
Have you started your holiday cards?? With the postal service expecting to be more overwhelmed than normal, we'd better aim to get our cards in the mail earlier than normal. (I'm always late to the post office with my holiday cards. To be truthful, I probably will be again this year, despite the best of intentions!)


No comments:
Post a Comment
Thank-you for sharing your thoughts.