
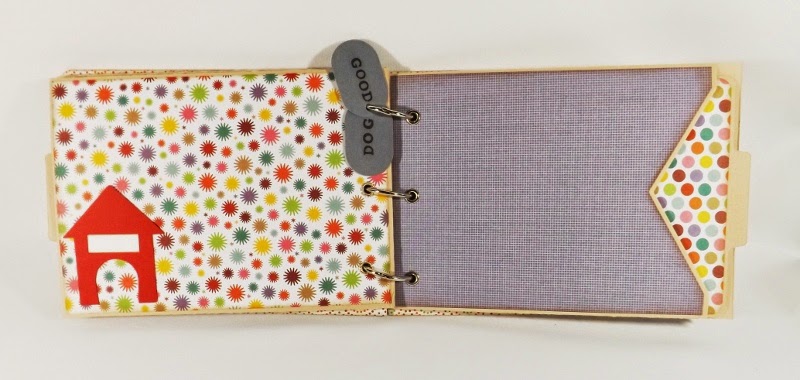
I finally decided to try a ring bound album with eyelets protecting the holes in the pages. I like this look on the albums I check out but, boy, I am disastrous with eyelets! [I've definitely got to abandon that binding system when the last of my eyelets are gone.]
I started this album with the intention of donating it to the Speaking of Dogs fall online auction. I thought I had lots of time to finish it, but then the Accucut Craft GrandeMark challenge snuck up on me [with a much earlier deadline that I remember last year!]. I like this challenge because it makes me find more ways to use my dies!
So, for the base of this album, I used a 5x7 inch pocket card. Every pocket has a large photo mat that will fit a standard print 4 inches by 6 inches here in Canada) without any trimming needed. Same for the backs of the pages and, on the fronts of the pockets, a little trimming it needed or a 3x5 inch photo will fit just fine.
I put my original die cut dog on the front.


I coloured this stamped out dog with my Copic alcohol markers.
 I made this dog house on my electronic cutter too. I designed two houses: a 2 storey and a bungalow. All I did to make it in to a dog house was welded an oval on for the door and cut it off at the bottom.
 I recorded a video for this album showing all the rest of the pages [about 5 times]. I outline all the Accucut Craft dies I used in there. I will upload it another day, because I am limited in the uploads per week that I can do.
I need to make another album to list for animal charity in my Etsy hand made card shop. I was going to make another dog one but I started realizing how many cat people I know. So, I decided to make a cat album. Once I made that decision, I realized I don't have a lot of cat embellishments. Well, that meant, I just had to make some. I already had a die cut fish (which I made for a "Birthday Fishes" card). I also already have a die cut cat, but it's very cartoon-ish. So, I made a kitty cat silhouette die cut. STAY TUNED to see it in a future unveiling!
(If you already like my die cut dog, I have some available in my shops!)
I started this album with the intention of donating it to the Speaking of Dogs fall online auction. I thought I had lots of time to finish it, but then the Accucut Craft GrandeMark challenge snuck up on me [with a much earlier deadline that I remember last year!]. I like this challenge because it makes me find more ways to use my dies!
So, for the base of this album, I used a 5x7 inch pocket card. Every pocket has a large photo mat that will fit a standard print 4 inches by 6 inches here in Canada) without any trimming needed. Same for the backs of the pages and, on the fronts of the pockets, a little trimming it needed or a 3x5 inch photo will fit just fine.
I put my original die cut dog on the front.
Another of my original die cut designs is the bone. It's really simple: two hearts and a rectangle welded together. I cut this big one and I also put a couple smaller ones in the album.
I coloured this stamped out dog with my Copic alcohol markers.
I need to make another album to list for animal charity in my Etsy hand made card shop. I was going to make another dog one but I started realizing how many cat people I know. So, I decided to make a cat album. Once I made that decision, I realized I don't have a lot of cat embellishments. Well, that meant, I just had to make some. I already had a die cut fish (which I made for a "Birthday Fishes" card). I also already have a die cut cat, but it's very cartoon-ish. So, I made a kitty cat silhouette die cut. STAY TUNED to see it in a future unveiling!
(If you already like my die cut dog, I have some available in my shops!)


