Here's the big reveal! This post is picture heavy, so grab a drink and settle in! There is also a video version of my
craft room tour available on my Vimeo Channel. I've designed my room in stations.
Stamping Station
- Microwave cart from Canadian Tire
- Close to my Heart stamps are in the first basket
- Stampin' Up! stamps are underneath
- Twine and Crochet threads in bottom basket
- Wood mount stamps are in the drawer.
- Some of my misc. clear mount and rubber cling stamps have been catalogued in a stamp binder in the cupboard.
- Non-catalogued ones are in little baskets in the cupboard
- Other stamping tools and cleaning supplies are in the bottom of the cupboard
Above the Stamping Station
This is my stickles board. I store my
stickles upside down. Hubby cut some shelves this year so I could put my ink on them and sprinkle some of my room decor around (my fairy and beanie dog). I bought curtain clips from Bed, Bath and Beyond to hold my sponges from a dowel. Binder clips could work, but they are hard to squeeze when on the dowel. They work if you are sliding the object off the dowel first and then squeezing. (Close up pictures of the curtain clips versus binder clips later.)
Cutting Station
- Home of my Accucut Grandemark
- Home of my paper cutter and glass cutting mat
- Home of all my dies
- Quickutz Dies are in a QK die binder
- I have another magnetic binder for nesting cookie cutter dies
Markers, Scraps, Xyron and Stuff Station
- I keep my cardstock scraps close to where I sit because I use them a lot
- My patterned paper scraps are in a photo holder box on the floor next to the cubes
- (Larger scraps of CS and Papers are kept with the whole sheets)
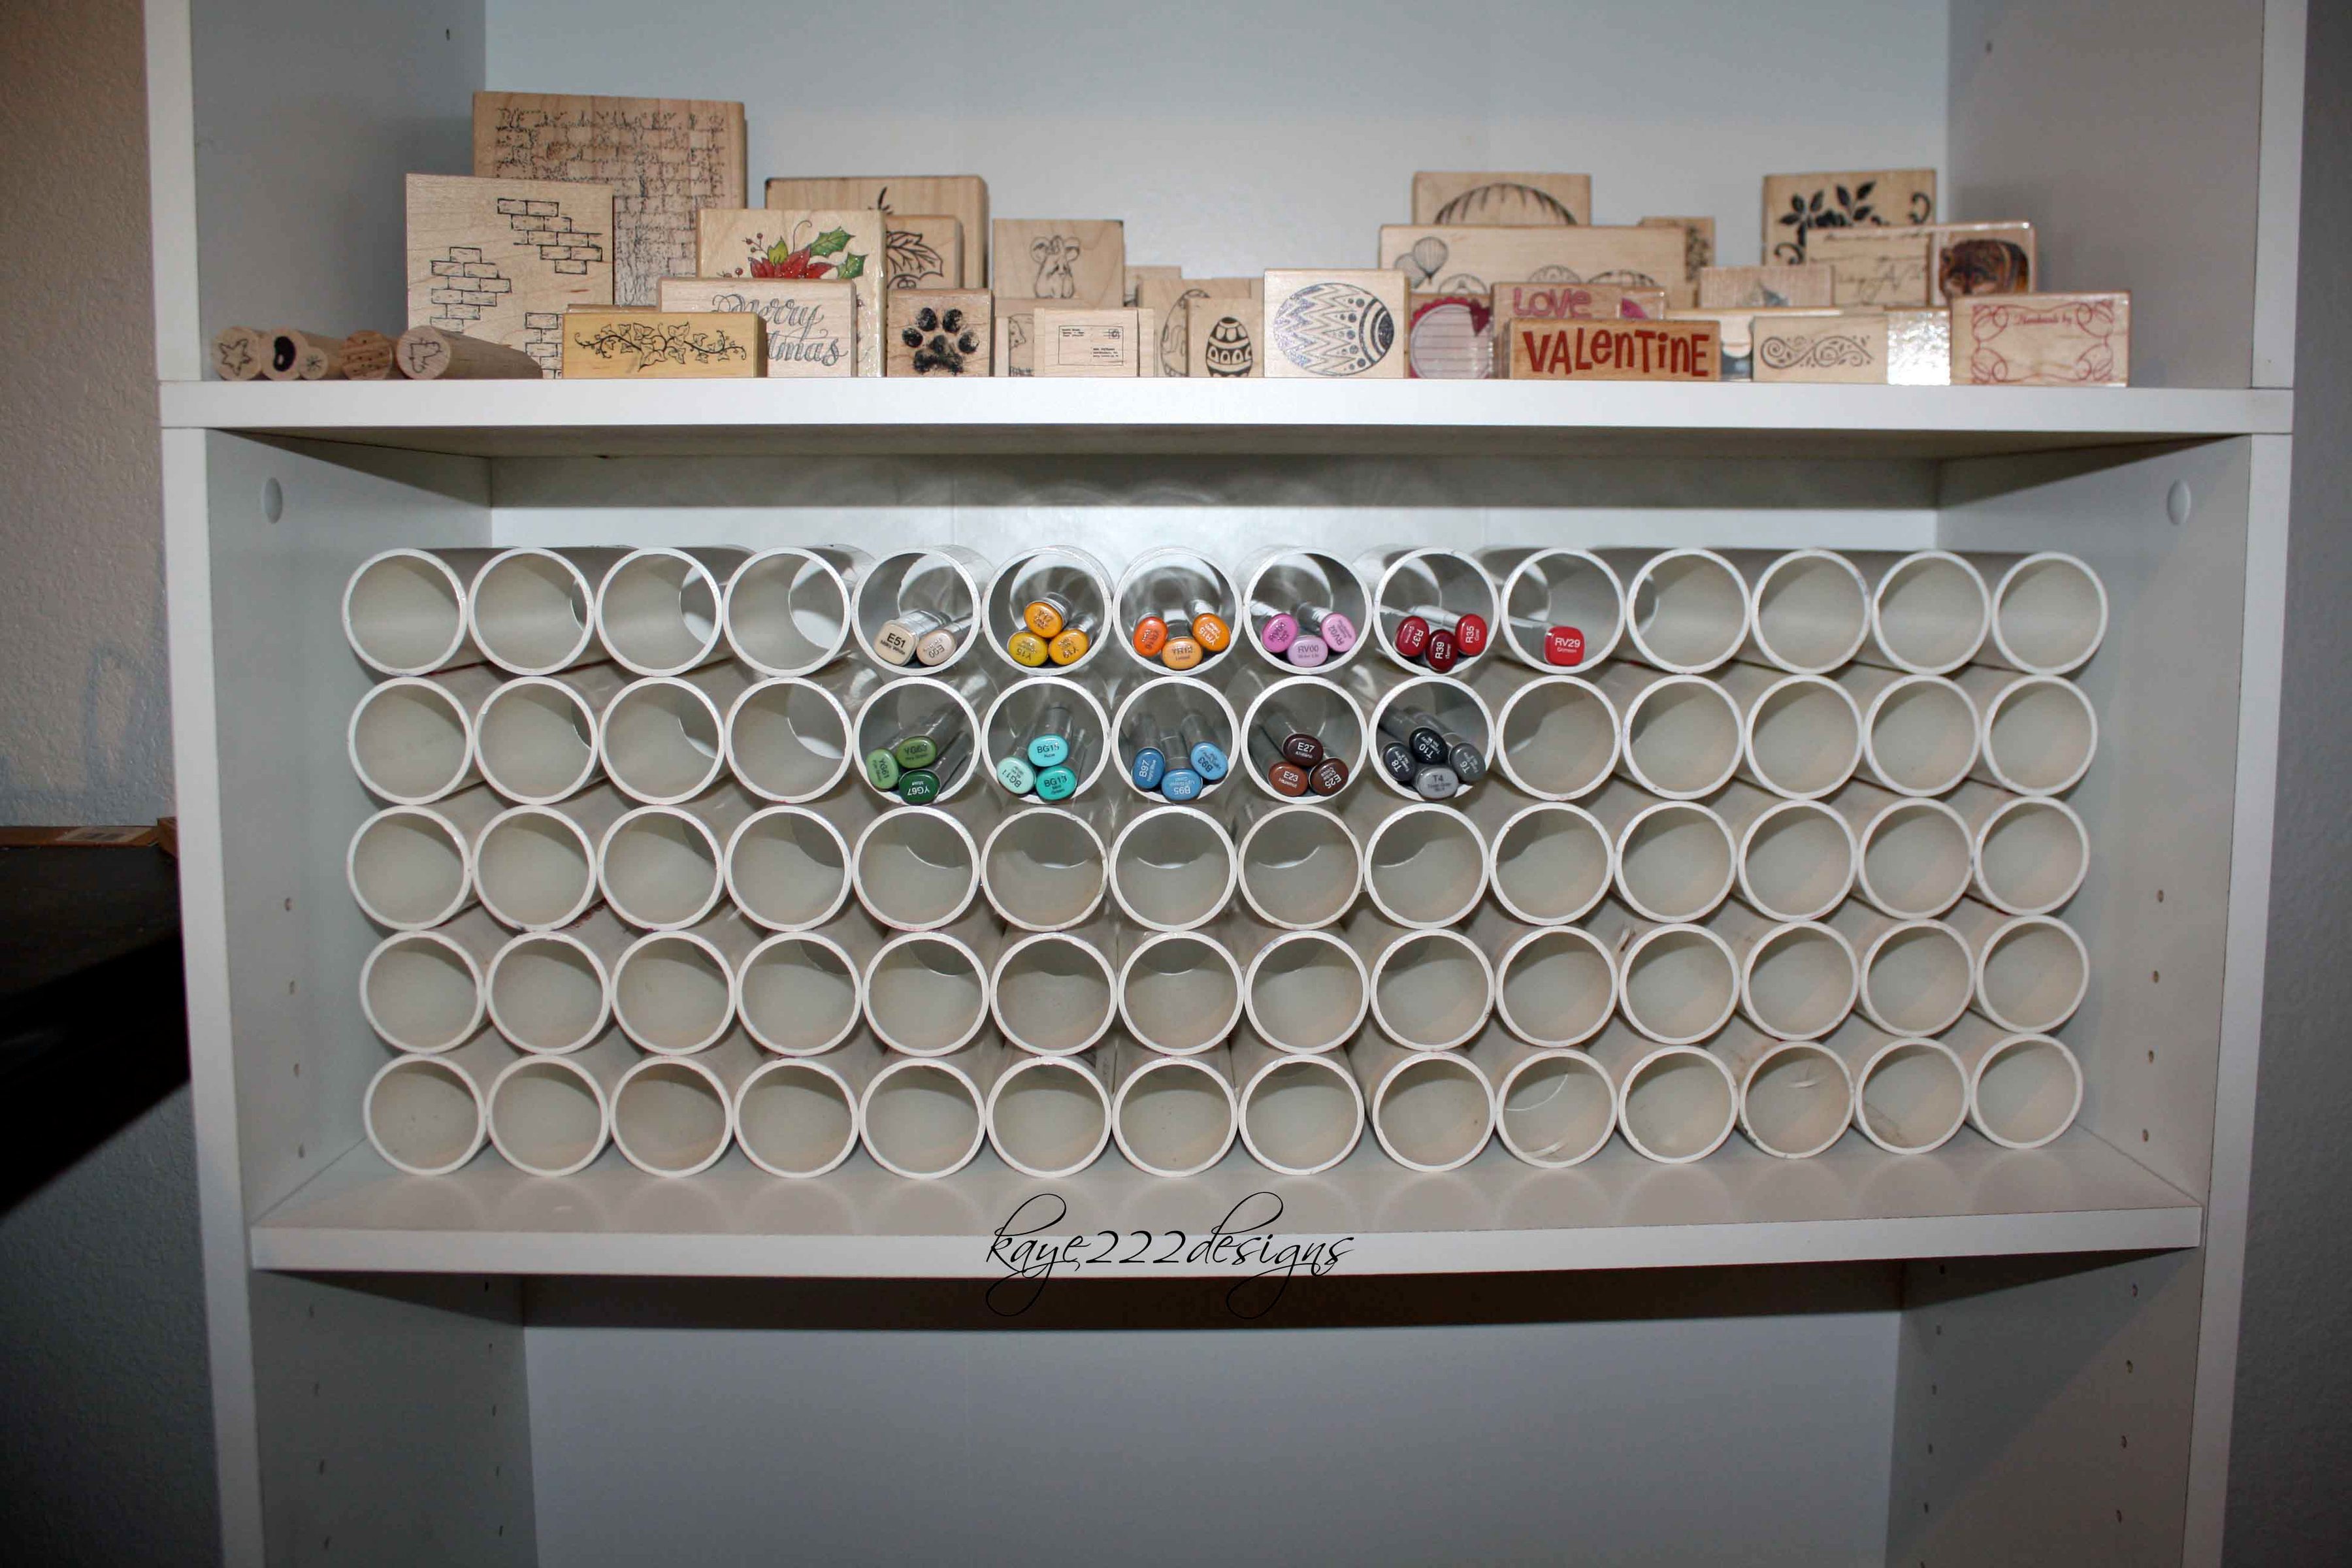
- I made my marker storage for my Copics and Tria Letrasets (same makers as Pro-markers). More on that later!
- The cubes on the left hold project parts and adhesives. I even have one blank drawer, ready for me to expand my stash!
Punches and Ribbon Storage
This is a Billy Bookcase from Ikea. We've had it for a year or two disassembled. I bought it for holding DVDs but hubby didn't like it. So, he finally assembled it and we put it in my room! (Close ups later!) I'm storing in it:
- plastic baggies
- envelopes
- punches
- ribbon
Workspace
- Two desks and one table
- Seats 6 for my small scale fundraising workshops
Ikea Expedit Storage Unit
- Ikea Drona Fabric Boxes - made labels with circle punches and wooden clothespins from the dollar store
- Ikea Kasset Boxes
Closet Slat Wall
- Obtained from a store closing (with acrylic shelf, hooks and paper holders)
- Holds all my whole papers and patterns - cardstocks on right, patterns on left, patterns in middle top and metallic cardstocks in middle bottom
- Holds random other stuff on hooks
- Shelf has some shipping supplies and stuff to be photographed for the shops
Close Ups
Curtain Clips v. Binder Clips
The curtain clips are 5x more costly than the binder clips. However,
the binder clips are hard to squeeze without removing them from the
rod. So, the curtain clips work best for the sponges and the binder
clips are slid on to the hooks in the slat wall.
Marker Storage
I used a 2L Chapmans ice cream tub for the Tria markers. I covered it with paper and used a large binder clip to stop it from rolling. I used holiday Turtles tins for the copics. They stick out a little from the top but I can still get the lid on and it JAMS the copics in there so they don't rattle around. I made the compartments by just making chipboard Xs. I took two pieces of chipboard and cut a slit in one and slid the other piece in it. The clear utensil drawers hold my Sakura stardust pens and my Close to My Heart alcohol markers (which are too long for either of my tins). I have a spare black and colourless blender in them too. I also have two round cookie tins below the shelf riser ready to hold markers. I might put my BIC Mark-Its in them but I like the fold out packaging that they already come in.
Embellishment Storage
I find I have to see stuff to use it. I had originally separated my embellishments by type: bling, brads, buttons, etc. However, I tend to think I need something of a colour rather than I need something specific like a brad. So, I tossed all my embellishments together by colour. The next time I think, "I need something blue", I can go to my blue embellishment box and find all kinds of things that could fit my project!
I got these boxes at Homsense. They have a hinged lid so I don't have to worry about losing the lid. I originally wanted baskets because I like how they look but having a lid means I can stack them. I used ribbon to indicate the colours inside the grey boxes and the black one holds my black, white and clear stuff and the brown one holds brown stuff.
The suitcase on top is my Christmas and winter stuff: stamps, punches, die cuts, etc. I also have a Halloween box. Those are two are clear themes so it makes sense to keep it all in one place.
Punches
I used the under cabinet storage for my punches. I also uses a shelf riser and stuck my border punches in the grooves. I don't have a whole lot of them, so this worked perfect for me!
Ribbons
I do not use my ribbons enough. I have tried many different ways of storing them and they ended up in three different places in my room. I still have a few hanging from the closet door, but those will eventually get used or get wound on to my new ribbon storage.
These are stacking pantry baskets from Home Outfitters! I love them! I used a barbecue skewer from the dollar store as my dowel. I have some old tape spools that I used as spacers for the baskets where I didn't have enough ribbon to go across. I like that I can just pull the ribbon through the wire to take what I need.
I even created some homemade ribbon spools. These are made from a strip of cardstock and two 2.5 inch circles. They are quite a bit smaller than the commercial spools but it was the biggest circle punch I had.
This tower was a little costly but pretty. You can make a white version with baskets from the dollar store. Here is link to that
ribbon pull basket tutorial. I have those baskets and I considered doing it but since my storage was a gift, I splurged! To make the dollar store baskets stackable just put a piece of chipboard between them. They should not be too heavy for thick chipboard.

 (You could just cut slits with an Xacto knife or use a slot punch to make a slide-in slot.)